Quantcast
Channel: Knot Just Macrame by Sherri Stokey
Viewing all 283 articles
Browse latest View live

7th Bead Soup Blog Party - Soup's On!

$
0
0
Bead soup from Juli Cannon

If you make jewelry, you've probably heard of Lori Anderson's Bead Soup Blog Parties, and if you haven't, you're missing out.  Lori explains it best, of course, but in a nutshell, a whole bunch of bead enthusiasts get paired up and send one another a "bead soup" consisting of at least a focal, a clasp and a few coordinating beads.  Then each person must make something using at a minimum the focal and the clasp.  I love to  see all the different soups - there really are endless possibilities.  Then seeing how those soups are transformed fascinates me.  

I have been partnered with the lovely and talented Juli Cannon.  This woman has some mad talent.  She makes lampwork beads AND does bead embroidery and bead weaving and jewelry design.  Her work is incredible.  Pop over to her blog, Studio Juls and take a look around.  You'll can thank me later.

So that gorgeous soup up there?  THAT'S what arrived in my mailbox the other day.  My eyes rolled completely back in my head, I swear.  Just look at that focal.  Juli made it to go with the dalmatian jasper beads - isn't that spiffy!?  She made the round lampwork beads with the swirls, too.  

lampwork beads by juli cannon of Studio Juls

And if all that wasn't enough?  She sent me another set just because!

green and aqua lampwork beads by juli cannon of Studio Juls

I am so in love with this set there aren't words.  My very favorite colors all rolled in together.  I just want to carry them around petting them all day.

And, because obviously Juli is an all or nothing kind of gal, she put in some Czech glass buttons for me to take her package past "over the top" and right to "out of the park".  

Czech glass buttons

I sent Juli a soup with a crazy lace agate with gray and yellows for the focal.  The porcelain owl bead is there just because I thought he was cute and matched the assorted glass seed beads and the mix of stone, recycle glass, Czech and Greek ceramic beads.  I put in a couple of different clasps - one metal and then one made of tagua nut.

Bead soup from Sherri Stokey with agate focal, owl bead, tagua nut clasp

This is the second time I've been able to participate , so if you're looking for something to do while you wait for this reveal, you can read about last year's here.  Be sure to come back on March 30th to see what I make with Juli's beads.  Oh, and if you want an endless supply of eye candy, check out the list of participants and their blogs on Lori's blog here.

Year Of Jewelry Week 10 - Wabi Sabi

$
0
0
Beaded macrame bracelet by Sherri Stokey of Knot Just Macrame with ceramic piece by Scorched Earth.

I have to admit I had no idea what Wabi-sabi was before this week's theme for the Year of Jewelry.  After a little research, this is what I can share:  Wabi-sabi is a Japanese aesthetic embracing beauty in imperfection and impermanence.  It's an acceptance of the natural cycle of growth, decay, and death.  Flea markets, garage sales, patina and cracks rather than shopping malls and shiny perfection.  OK, I can do this.  I'm the queen of garage sale season.  Check out these posts about my booty (and that's like loot booty - minds out of gutters, please) Saling and Garage Sale Finds.

Turns out it's way harder than it sounds, if you're fussy like me.  My little knots have to line up just right or all is not right in my world.  But, I know an artist who does wonderful things with imperfection and I recently had her make some bracelet ends that I designed just for macrame.  Petra of Scorched Earth did these end pieces for me.  They're just incredible andthey have a bar for me to attach my cords.  She has an organic, earthy style that doesn't even pretend to be perfect, and that's the beauty of it.

Micro Macrame bracelet with picasso czech glass beads and ceramic end pieces.

I was a little off my game when I sat down to make this piece.  The first time around I cut my cords too short.  The second time they were the right length, but I decided the color was wrong.  Third time's a charm, though, I got them long enough and I really like this green color with the end pieces and the Czech glass beads.  I've used these beads with Petra's pieces before - I think they go well together.  There's nothing fussy about these beads.  They're colorfully unapologetic.

Macrame with Czech glass beads with picasso finish
  
And there you have it.   That's my homage to  Wabi-sabi.  I know I didn't really get in the life cycle concept.  It's pretty hard for me to wrap my mind around the death of a bead.  It's just too sad - we can't go there.  But I did manage to loosen up and bit and get a little more organic feel to this piece.  I think.  Either way, it was a fun exercise and I really love the bracelet!

Micromacrame bracelet with beads and clay end pieces
 

Year of Jewelry Week 11 - Rescued from the Scrap Bin Earrings

$
0
0
Broken clay beads maybe trade beads

This week's theme for The Year of Jewelry is "Rescued from the Scrap Bin" and I found just the piece to rescue.  I picked up a necklace a while back at an estate sale because I thought the beads were interesting.  The piece was in really bad shape.  The knotted leather holding the beads together was cracking with age and several of the beads were chipped and broken.  But I still thought it had potential.

Estate sale necklace with clay beads

I did a little asking around online and the most common opinion is that these are trade beads.  Apparently clay beads like this come from Africa, Asia, and Central and South America and the metal beads with them are common of North Africa and India.  No matter where they came from, I like them.  I thought I'd do a quick pair of earrings with a couple of the beads.  Something a bit rough around the edges and unrefined like the beads.  And since my metal working skills aren't that great, that's exactly what I got.

Earrings by Sherri Stokey of Knot Just Macrame using handcrafted brass findings, trade beads and cord.

I bent some scrap pieces of antique brass into horseshoe shapes and then beat the heck out of them until they were fairly flat.  I hung the beads at the top of the arch using some scraps of cord left over from a bracelet project and added little bits of wire to the bottom to hold the cord and the top to hold everything in place.  I made really simple ear wires to match.  Easy peasy and very different for me.  And I still have quite a few beads left from the necklace:)

Holiday Bling Blog Hop 3 Reveal - Happy Everything You Do Is Right Day

$
0
0
Happy Everything you do is Right Day Happy guy

That's right folks, you heard it here.  Today, March 16, is Everything You Do Is Right Day.  Think about that for a minute.  Margaritas for breakfast?  Well sure, any other day of the year that might be a problem, but today?  Everything you do is right, remember?  Game on.

When Marlene & Shelley of MarShellSwaps decided to host a spring version of their popular Holiday Bling Swap and Blog Hop, they didn't specify which spring holiday we should celebrate, nor did they tell us what we should swap.  They left it all up to us.  My partner, Lori Bowring Michaud of Artfully Ornamental  and I tossed around a few ideas and then we realized the reveal was today - Everything You Do Is Right Day - and well, everything was easy after that.  Because today we can do no wrong.  Ha.

Most of the items in the previous HBBH swaps have been ornaments or jewelry, but Lori and I decided to do our own thing and swap jewelry components.  How fun is that!?  And without further ado, the components Lori sent:

From Lori Bowring Michaud

The top piece in this photo is a polymer and crystal slider.  On the bottom, the clasp on the left is sea glass set in resin in a Susan Lenert Kaszmer bezel and the clasp on the right is made of a vintage copper leaf, Ann Ricketts lampwork bead and Swarovski crystals.  I'm in love already.  But wait - there's more...

sea glass in resin

dilled sea glass

Sea glass!  I adore sea glass!  And not only did Lori send drilled pieces, she set some heart shaped pieces in resin in a gorgeous connector piece.  But no, that's not all...

Handpainted stained glass button by Lori Bowring Michaud

Hand painted stained glass button, anyone?  And, as if all that wasn't MORE than enough, Ms. Lori included one more thing:

Handpainted polymer pendant/bracelet focal

A hand painted polymer pendant/bracelet focal.  Everything is so beautiful and Lori was way too generous.  But since today is Everything You Do Is Right Day, I'm going to accept everything she sent and float around all day on a cloud of euphoria - because it's the right thing to do.  And I'm going to be wearing this bracelet I put together using her sea glass and resin clasp:

Bracelet using Windbent polymer clay bird, sea glass and resin clasp, Kazuri bead, lampwork spacers and dyed howlite starfish.

Isn't that fun!?  It seem beachy and makes me feel all warm and fuzzy inside.   I used some pieces I've been collecting.  The blue bird in the front is by Lennis Carrier of Windbent and the big striped bead is a Kazuri bead.  There are also a couple of dyed howlite starfish (or sea stars, if we're being politically correct and up to date here) and some other bits and pieces.  I think everything goes well with Lori's beach glass clasp, don't you?

Be sure to pop over to Lori's blog, Artfully Ornamental, and say "hi".  You got it - it's the right thing to do.  Then go eat cookies for lunch.  Oh, and here's the list of other hop participants.  Tell 'em I sent ya.

Alicia Marinache
Catherine King
 Chris Schlicht
 Cynthia Machata
 Dyanne Everett-Cantrell

Gina Hockett 
Jennifer Reno
Laura Reed
Leanne Loftus
 Lennis Carrier

Lori Bowring Michaud
Marti Conrad
Mary Govaars
Renetha Stanziano
Rita/ Toltec Jewels

Sandra McGriff
Sarah Goode 
Sherri Stokey  <----Yep, you are here
Sonya Stille 
Tammie Everly

Therese Frank 
Tiffany Goff Smith
Marlene Cupo
 Shelley Graham Turner

Spring Has Sprung Beaded Micro Macrame - Year of Jewelry Week 12

$
0
0
Close up of beaded micro macrame bracelet in spring yellow by Sherri Stokey of Knot Just Macrame

Our "assignment" for this week at the Year of Jewelry is Spring.  As in Spring Has Sprung.  Which is a great thought, by the way, and technically (as in according to the calendar) spring has arrived.  Here in my neck of the woods, however, the weather is anything but spring-like.  It was flat out cold this morning and there's a chance of snow for the next several days.  

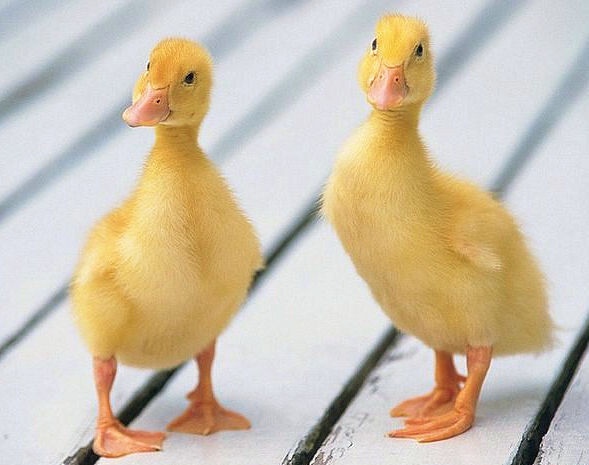
For the sake of this exercise, I'm going to pretend spring has arrived.  I'm going to imagine I can see tiny buds of the softest green on the trees with promises of  summer behind them.  I'm pretending the hyacinths and tulips and crocus are blooming with the sweetest of spring hues.  And in the midst of this spring utopia, there must be ducklings, because there is nothing that screams spring more than baby ducks.  They are absolutely the most adorable little things, too - maybe even cuter than kittens and puppies!

With flowers and duckies on my mind, I came up with these pieces for the week:

Beaded macrame bracelet and earrings in soft yellow

Did I lose you on the translation from duckies and flowers to macrame jewelry?  It seemed perfectly logical to me, but I've also been told I don't think the same as "normal" people... I used the perfect duckling yellow cord and beads and the pattern has a sort of floral feel to it.  Are you with me?  

Beaded micro-macrame bracelet knotted by Sherri Stokey

Beaded micromacrame earrings from Knot Just Macrame

OK, don't say I didn't warn you.  I'm going to prove that baby ducks are the cutest thing ever.  Ready?

ducklings

Told you.

Bead Shopping

$
0
0
Holy cow!  I've been MIA for quite a while now!  Oops!  I have been out of town all week babysitting for my brother's children so he could take his wife to Europe.  I'd forgotten how much energy it takes to chase a four-year-old and a six-year-old around all day.  Whew.  I did, however, find a little bit of time to do some bead shopping.  I found one store going out of business where everything was 40% off.  Now that's my kind of sale!  I found some Czech assortments and some great Czech buttons there:

Czech glass bead assortments and Czech glass buttons

I also got to meet up with a friend who took me to a couple more shops.  Star is a fellow jewelry maker I met on Facebook and we finally got to meet in person:

Star Teague and Sherri Stokey

She's great fun!  We hit The Colorado Bead Company and The Peacock Shop, and I picked up a few treasures to add to my stash.

Star Teague at the Peacock Shop in Denver

I Fondle Beads bumper sticker from the Peacock Bead Shop and some things I bought there

Czech beads from The Colorado Bead Company

I also found a couple of kits to play with.  I don't usually do kits, but sometimes it's a fun way to learn something new.  I bought one for a chain maille bracelet that I'm excited to make:

Chain maille bracelet kit

After we'd shopped, Star bought me a latte at her favorite coffee shop.  It was the perfect ending to a great outing.  

Latte from Paris on the Platte

And I can't leave out this photo:

Star Teague in a mustache

Year of Jewelry Week 14 - It's Egg-citing Beadweaving Bracelet

$
0
0
Square stitch circles beadweaving bracelet by Sherri Stokey of Knot Just Macrame

OK, OK.  If you've been following my Year of Jewelry exploits, you might realize that I skipped a week.  Week 13 was to make a personal talisman and I just haven't found the perfect piece yet.  Meanwhile, the weeks were starting to pass me by, so I skipped ahead to Week 14 - It's Egg-citing.  And yes, I should have had this piece done last week and I should be working on the piece for this week, but that theme is The Fibonacci Sequence which has me totally baffled, so I floundered a bit.  

All that aside, let me tell you about this bracelet.  The theme was eggs, as in decorated Easter eggs.  I went with circular patterns and used spring colors that would be right at home on an Easter egg.

Apricot, blue, teal and pink seed beads

Let me tell you, this was slow going.  And by that, I mean it took FOREVER.  Eons, at least.

Close up of square stitch circles

It's a fun piece, though, and I like the outcome.

Square stitch circles beaded bracelet in Easter Egg colors by Sherri Stokey

Close up of bead weaving bracelet in apricot and teal and other spring colors

Now I just have to figure out how to use the Fibonacci Sequence in jewelry.  Uh huh.

7th Bead Soup Blog Party Reveal

$
0
0
Handmade fringe bracelet by Sherri Stokey of Knot Just Macrame with Juli Cannon lampwork focal
Yay!  Today is the day I can show you what I made from the fantastic bead soup my partner Juli Cannon sent me!  Do you remember what everything looked like?  You can go here and read more about everything she sent if you'd like, but I'll give you a hint:

Bead soup from Juli Cannon with black and tan lampwork

I have been wanting to try a different fringe technique for a while and Juli's lampwork focal was the perfect piece.  I used several colors of seed beads and made billions of loops (okay, you got me... I didn't count and there might not be quite a billion, but there are lots).

Close up of bead weaving fringe seed beads

And after all that work, the clasp didn't look right.  Well, shoot.  So I stewed around on it for a week or so and decided the only solution was to make my own using some of the matching lampwork beads.

Close up of handmade clasp with clapwork beads

It's simple, but it works and it doesn't distract from the rest of the piece.  That's a win in my book.  

Handmade fringe bracelet by Sherri Stokey of Knot Just Macrame with Juli Cannon lampwork focal

Of course, that meant I had to make another piece to use the clasp, since the rules say you must use at least the focal and the clasp.  I sketched out a sort of funky necklace and it actually came together just like I'd hoped.  That never happens. 

Black and tan necklace by Sherri Stokey of Knot Just Macrame

And what's even better?  This piece can double as a wrap bracelet.  In fact, I think I like it better as a bracelet!

Necklace doubles as a wrap bracelet

Many thanks to my partner, Juli, for the great beads I used in these pieces AND the second set she sent just for me:

Lampwork glass beads by Juli Cannon of Studio Juls

And heaps more thanks to our gracious hostess, Lori Anderson, the mastermind behind the whole Bead Soup phenomenon.  She does an amazing job at bringing together a talented group of jewelry designers - 541 designers from 28 countries!  With so many folks eager to participate, she had to split us up into three reveal dates to keep things manageable. Hop on over to Lori's blog where she has a list of ALL of the other participants:  here.  Oh, and don't forget to check out Juli's page to see what she did with the soup I sent to her.  Happy hopping!!


Week 16 Year of Jewelry - My Color Experiment

$
0
0
Four color variations of a micro macrame bracelet by Sherri Stokey of Knot Just Macrame.

Yes, I've gone off-road again.  This week's theme was Something Hidden, but I (quite accidentally) went my own way again.  I started off with this bracelet.

Bracelet knotted in teal, turqoise, marina blue and mustard

I like to play around with color and I know blue and orange is an age old combination, so I put my own spin on it using a deep marina blue cord, teal and turquoise beads and then a pop of mustard.  I loved the result, but someone mentioned using coral instead of mustard, so I had to make another with that variation.

Bracelet knotted in teal, turqoise, marina blue and coral waves pattern

And by this time I was thoroughly smitten with the "what-if" bug and just had to see what would happen if I replaced the coral beads with chartreuse.

Beaded macrame bracelet knotted in teal, turqoise, marina blue and chartreuse

That one, by the way, is going in my books as an all-time favorite, but of course, me being me, I couldn't leave well enough alone.  I had to try switching out the chartreuse with lavender.

Beaded macrame bracelet knotted in teal, turqoise, marina blue and lavender seed beads

Needless to say, after all this what-iffing and substitution, I ran out of time to make a "Something Hidden" project.  Unless you count the newest project I have pinned on my board - marina cord with teal and turquoise beads but substituting orange for the lavender.  It's a sickness, really.

Four color variations of a micro macrame bracelet by Sherri Stokey of Knot Just Macrame.

Organically Yours - Year of Jewelry Week 17

$
0
0

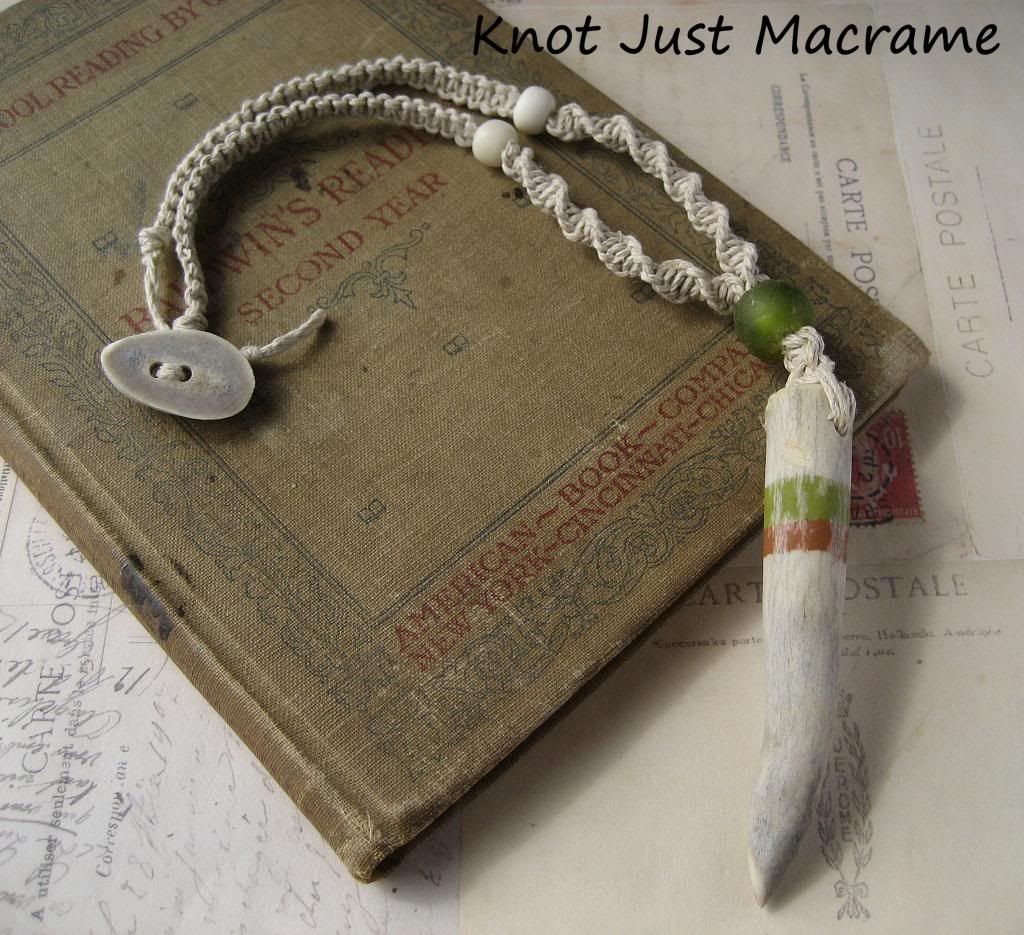
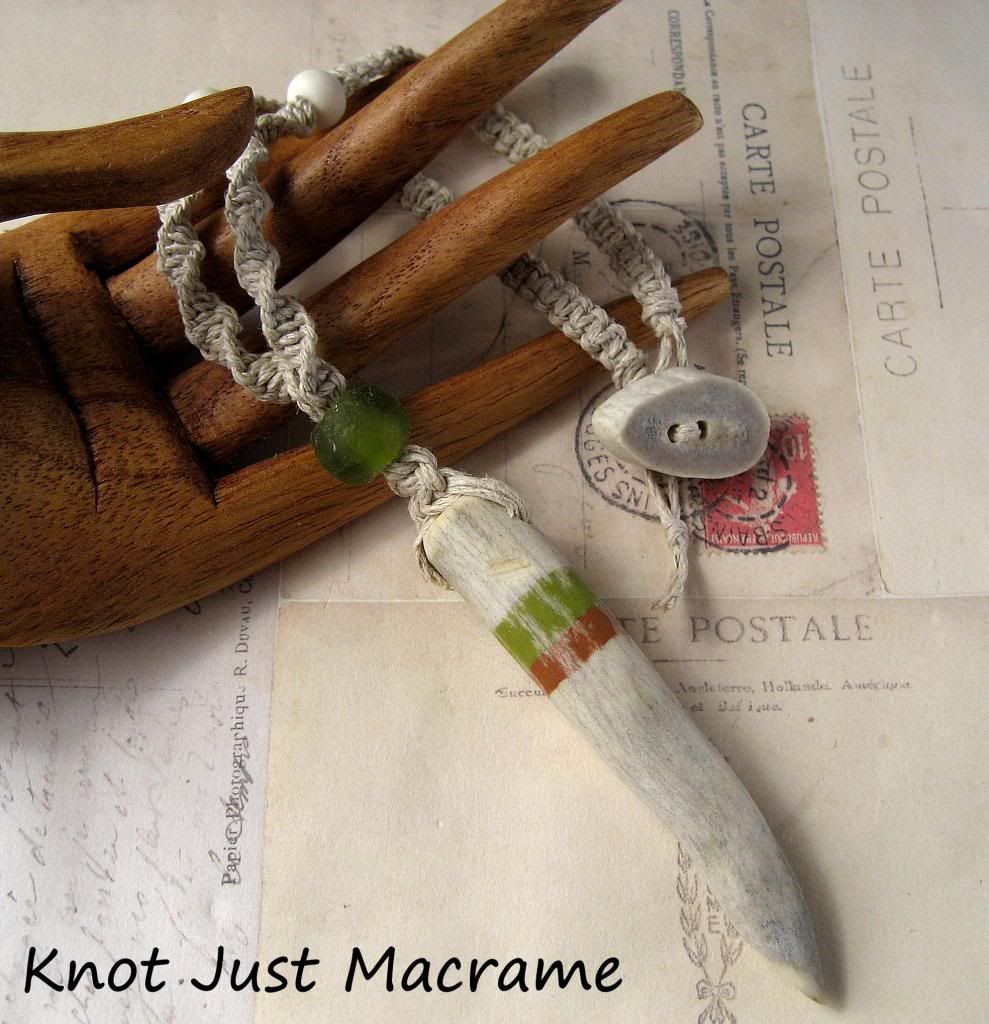
Antler tip pedant on a macrame necklace by Sherri Stokey
 
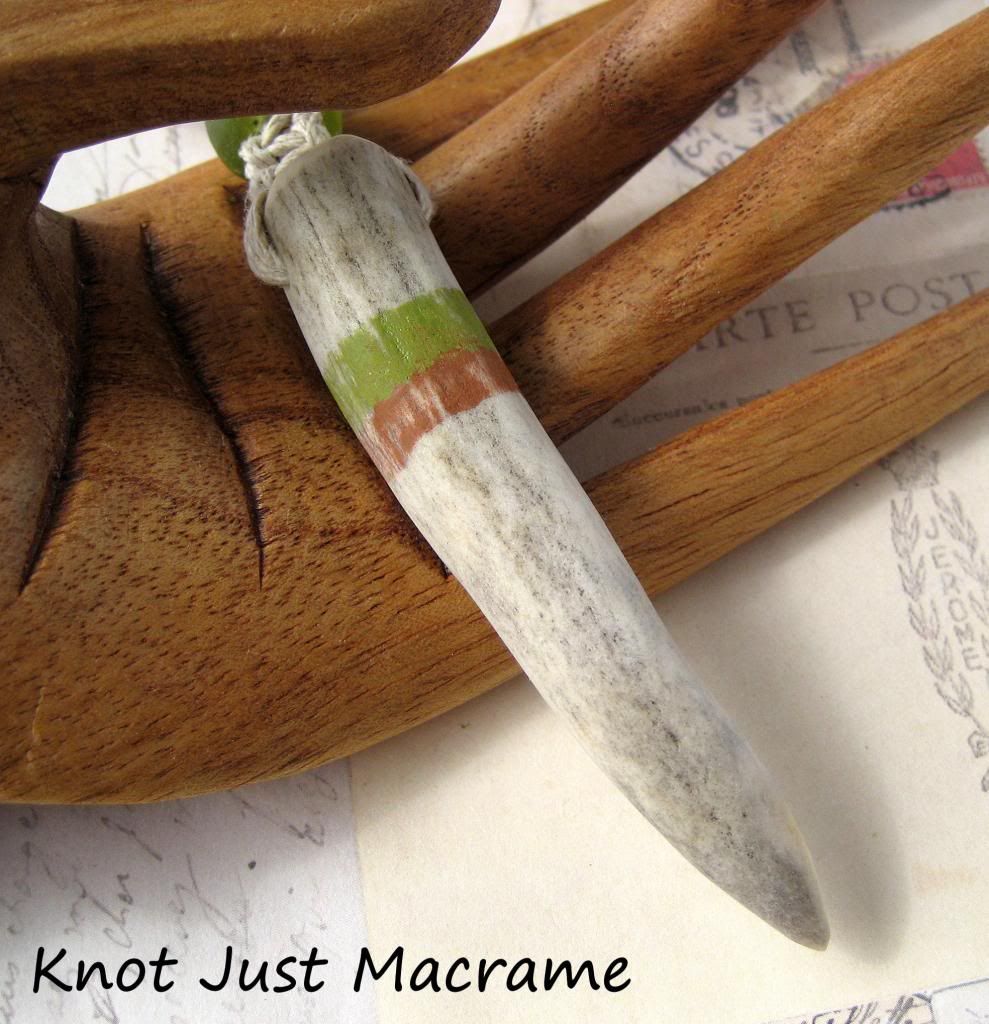
Our theme for this week for the Year of Jewelry was Organically Yours.  I stink at free-form business, so I decided to take the organic theme literally.  My dad made some antler buttons and some antler tip pendants for me a while back and I thought this would be the perfect project for them.  I painted a couple of lines on the pendant to add some color and interest, and then I sanded most of it back off to keep it looking weathered and rustic.

Altered antler tip pendant, painted and sanded

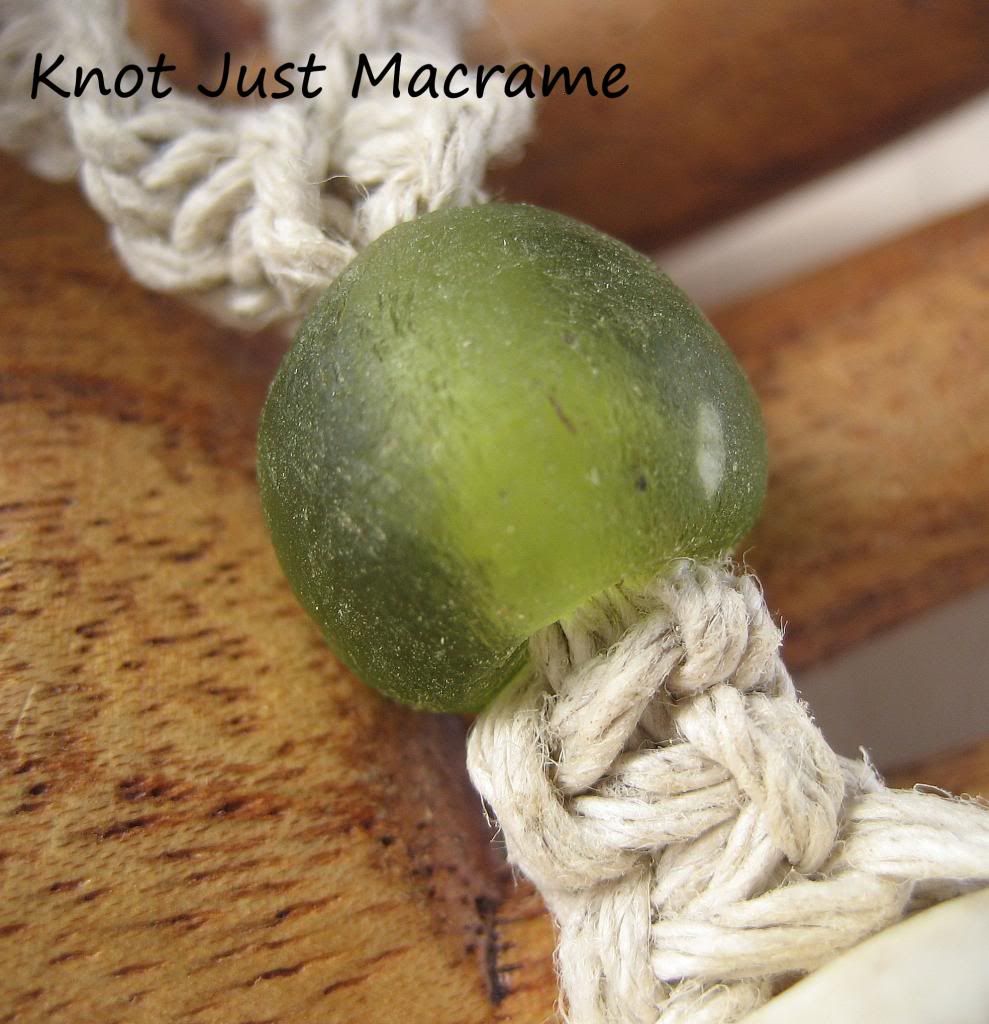
I wanted just a little more color, so I added a cool recycled glass bead from Ghana.  I love the imperfections in the glass.

Recycled glass bead from Ghana


My usual nylon cord just didn't seem right for this project, so I dug deep and pulled out some hemp.  It just isn't consistent enough for fussy micro macrame pieces, but it's exactly what this piece needed.

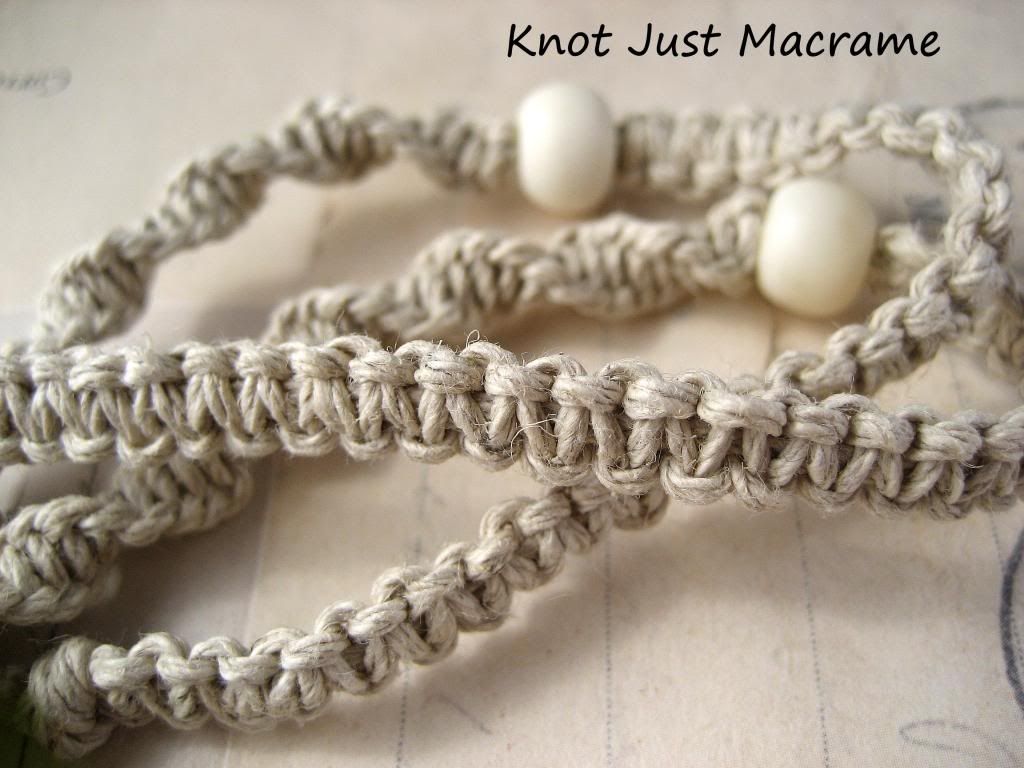
macrame knots in hemp cord with bone beads

Oh, and those two beads in that last photo?  Bone.  Then one of Dad's buttons for a closure to finish it off.

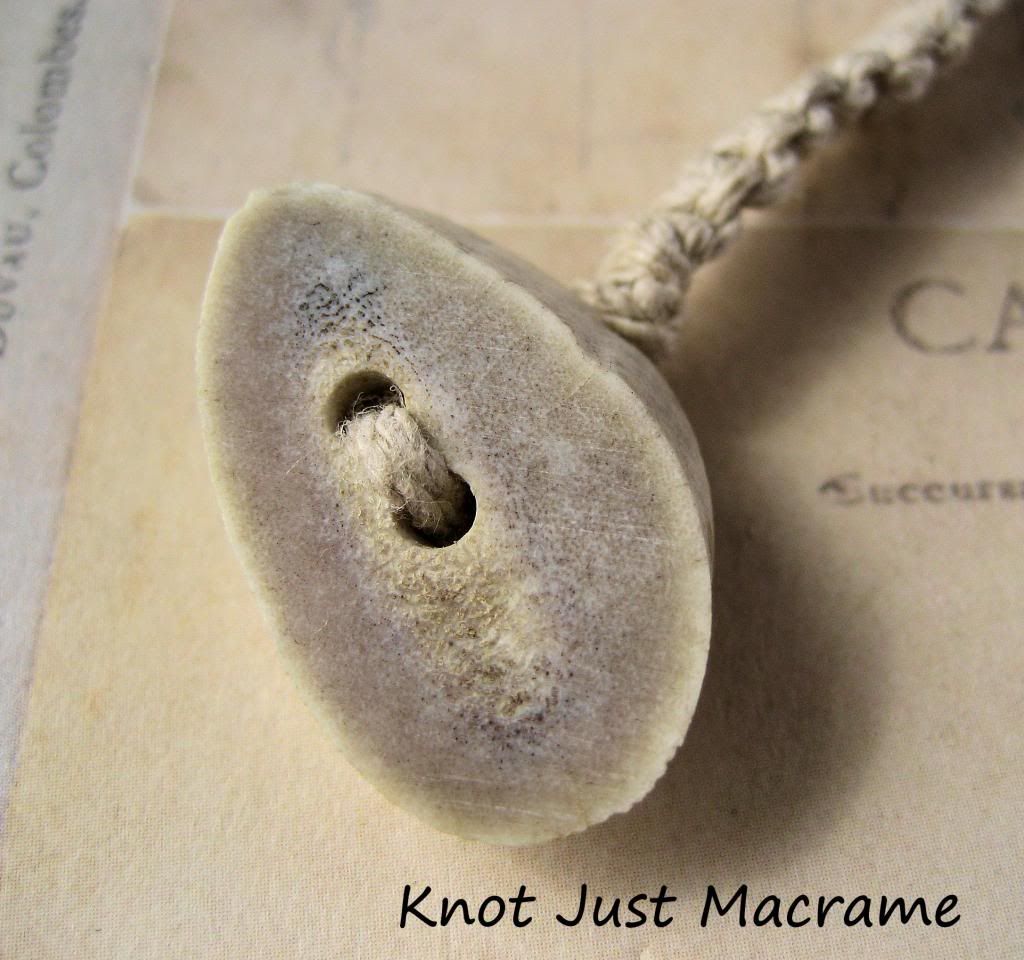
Antler slice button

And there you have it:  Organically Yours.

Knotted hemp macrame necklace by Knot Just Macrame with antler pendant and button

Failure 101

$
0
0
Micro macrame bracelet by Sherri Stokey of Knot Just Macrame

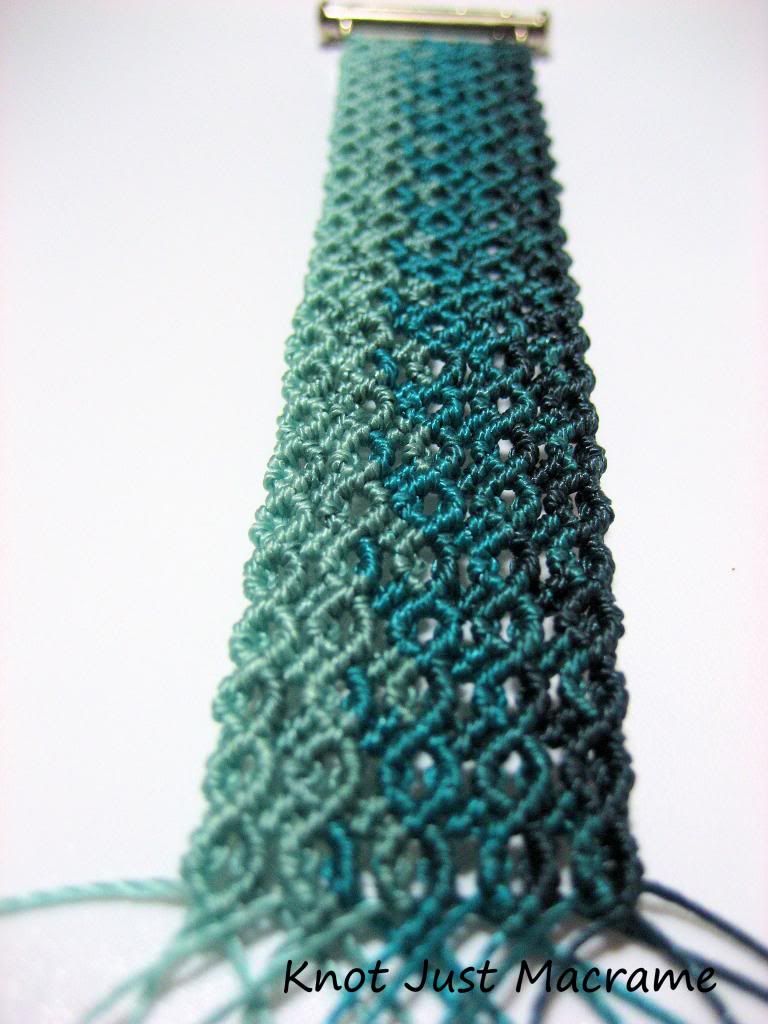
So, I was messing around the last couple of days, trying to learn how to knot this scallop pattern.  I have had to really think about each knot, which is something I haven't had to do much lately.  I even had to switch off my ridiculously cheesy sci-fi shows to concentrate on the knotting.  I started off fairly well, if a bit slowly:

Learning a new knotting pattern

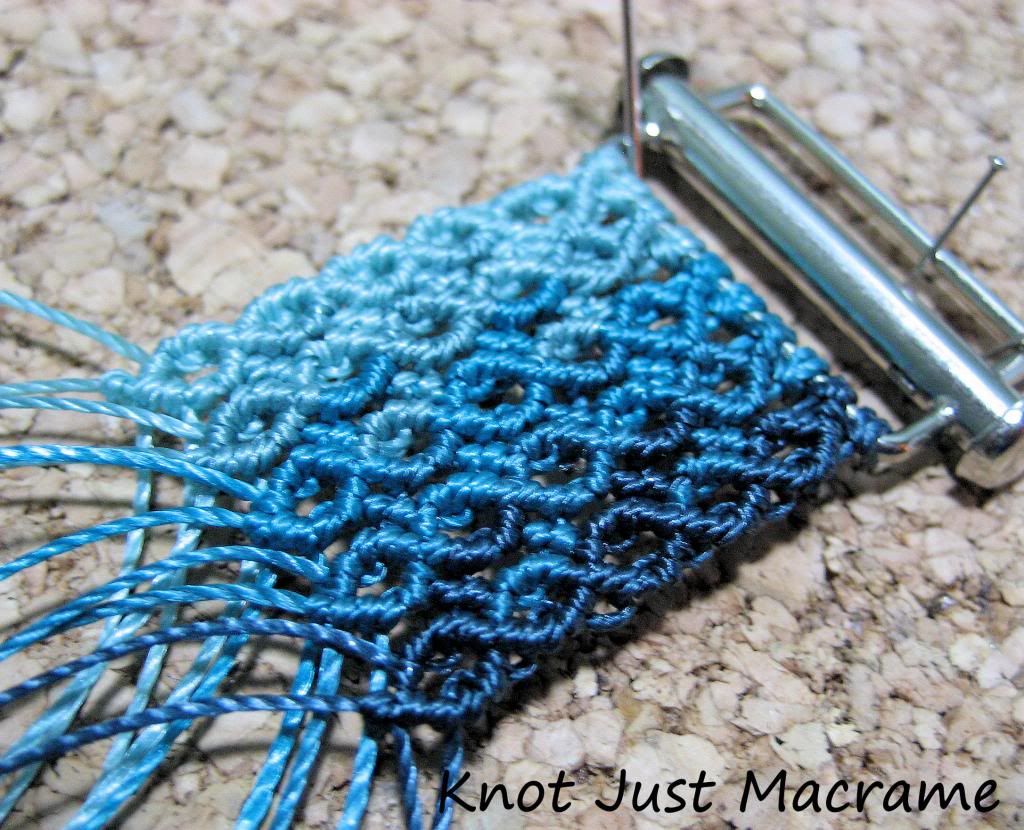
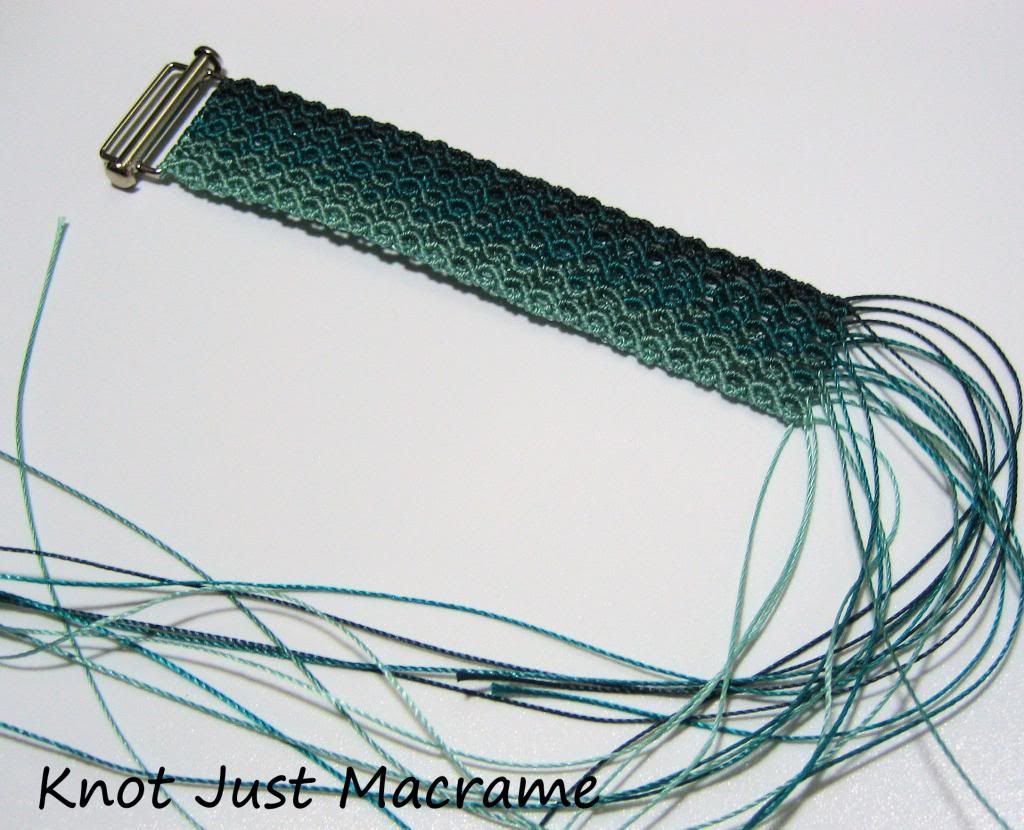
The color looks a bit more blue than teal in this photo because of the lighting I used last night, but here's where I was.  I used five different shades of cord to get the ombre shading.  I couldn't wait to get home from work this afternoon so I could work on it.  I knotted and knotted and knotted:

Ombre shading in teal

I'm absolutely fascinated with the undulations and the color gradient.  I'm admiring my handiwork, when it starts to dawn on me that I'm running short on cord.

Unfinished macrame bracelet

And no matter how hard I try, I'm not going to get this bracelet past 5.5".  I've had some suggestions for adding some beads to one end before the clasp and I may have to explore that option.  It's not a total loss, though.  I did get a handle for this knotting pattern, I think.  And I will definitely be trying it again.  If you want to try your hand at this one, I found the video here.  Be warned, though - she doesn't explain the actual knots, just the pattern, and it's not in English.  Or if you'd rather see a bracelet in ombre shading that didn't fail, check here or here :)

Year of Jewelry Week 18 - Pantone 2013

$
0
0
C-lon bead cord in Pantone Vivacious fuchsia range

The "assignment" for this week in the Year of Jewelry was to make something in one of the Patone colors for 2013.  I chose Vivacious, a bright shade of fuchsia which is part of the  Pantone Fall 2013 Color Report.  I wanted to do some ombre shading, so I chose the cord range in the photo above.  So far, so good.

Micro macrame bracelet in progress by Sherri Stokey

 I messed around with the curvy pattern again - its sinuous lines really intrigue me and the shading is such fun.  If you follow my blog and saw my last crash and burn on this pattern, you'll be glad to see I started with LOTS of cord this time.  (If you don't read my blog regularly, you can find out what I'm talking about in this post.)

Micromacrame knotting with ombre shading by Knot Just Macrame

Micromacrame knotting with ombre shading in fuchsia Vivacious

Oh, and the "failure" piece?  You don't have to worry about him any more - he found a home with a lady who has a 5.25" wrist.  All's well that ends well.

Two micro macrame bracelets by Sherri Stokey of Knot Just Macrame

It's a Wrap

$
0
0
Macrame wrap bracelet by Sherri Stokey of Knot Just Macrame

I've been experimenting a bit with S-Lon Tex 400 cord again.  It's what I used to make the multi-strand necklaces I wrote about here and here.  I'm a big fan of stacks of bracelets and wrap bracelets that mimic the look of a stack, and I thought the heft of this cord might lend itself well to that kind of piece.

Close up of ladder, square knot and woven beads section

I kept everything kind of random to get the look I wanted.  I started with a ladder of Czech beads in a cool matte metallic finish in between my Tex 400 cord and I finished that section with a knot and a lampwork bead.  For the next section, I added some gold Tex 400 cord and did square knots with the beads on the outside.  Then came some woven fiber beads I dug out of my stash, and a section I wrapped in some blue cord (the .4mm size).

Czech glass beads spiral knotting, antler button, glass dice beads

Next I threaded on some rough Czech beads and did a simple knot between them and followed that with another length of square knots, this time in light gray.  I added a black and white striped trade bead and then a little pop of blue cord again, this time in a spiral knot pattern.  I love the Czech glass dice beads and I have some in sort of an old antique looking finish, so I stuck a couple of those in.  I used a button my Dad made for me for the closure - a slice of antler.

Macrame wrap bracelet by Knot Just Macrame

This piece is 30" long and goes around my wrist four times.  My wrist is only about 6", so if you decided to make one of these, be sure to make it plenty long.  I do love how it turned out.  So much, in fact, that I decided to try another.

Knotting, Czech glass diamonds, Kazuri bead

I went with a color theme of chartreuse, capri blue and white and used some funky diamond shape Czech glass beads and a Kazuri bead as well as some seed beads.

Assorted knotting and knot covered hoop

I also used some random lampwork beads and one stray metal hoop - I just continued my knots all the way around it!  A simple white button finishes the whole thing.

Wrap bracelet in blue, white and chartreuse

I love these colors.  They just seem so crisply summery to me.

Blue, chartreuse and white macrame wrap bracelet by Sherri Stokey

I'll definitely be making more bracelets in this style!

Multi Wrap Macrame Bracelet Tutorial

$
0
0
Macrame wrap bracelet tutorial by Sherri Stokey of Knot Just Macrame

I had some folks request a tutorial for a macrame wrap bracelet like the ones I showed in post here and it's so easy to do, I thought I'd take a stab at it.  You will need:
  • 2 pieces of Superlon Tex 400 cord or C-lon Heavyweight cord in whatever colors you like
  • An assortment of interesting beads with holes big enough to get one piece of cord through
  • Some 8/0 and/or 6/0 seed beads
  • A button or bead for the closure
You will also need a very basic knowledge of knots. I used a lark's head, half knot, square knot and overhand knots, in this piece.  If you aren't familiar with them, check out my friend Donna's page here.   Keep in mind that there is no "wrong" here, so if you're not comfortable with one of the knots, skip it or do something different.  If you're an advanced knotter and you want the short version of these instructions, you can skip clear down the page to the bold part.  Otherwise:

Start with two pieces of cord 150" long each and fold them in half - this is where the loop will be.  Still working there in the middle, use one cord to make a series of larks head knots around the other cord.  Check it periodically by holding the four cords together and attempting to slip your button or bead (whatever you are using for your closure) through the loop.  You don't want to get clear to the other end only to find your loop is too small, trust me.  When you get the right length, pull all four cord together.  Hopefully your knots stayed fairly well centered on your cords and the four lengths left hanging are somewhere near the same.  Use the same cord you did the larks head knots with to make a series of square knots around the other two cords. 

Did I lose you?  It's not hard, really.  And if the larks head loop thing has you worried, just make a loop the right size and tie an overhand knot and move on.  Your closure won't be as fancy, but it will work just fine.  I had to be different, so I added beads to the knotting cord between each knot, but that's entirely up to you.  Now pat yourself on the back, because if you got this far, it's easy sailing from here on out.  If you're still worried about the knots, I did a little pictorial tutorial here - click on the photos to see the written instructions.  Channel your inner girl/boy scout.

Macrame wrap bracelet tutorial by Sherri Stokey of Knot Just Macrame

Now all you're going to do the rest of the way down is knot those four cords.  In the example above, when I knotted with the green cord, the navy was hidden inside.  Then I switched to knotting with the navy cords around the green ones, and an easy way to switch is to put all four cords through a bead.  Then you can start knotting with the other color without the transition showing.  You will want to switch your knotting cords from time to time or you will run out of one color and end up with a short bracelet!  Another way to transition is with an overhand knot, and I like that between beads.  In the example above, the green diamonds are Czech glass and the hole was only large enough for one cord, so I put the one cord through and the other three behind the bead and tied a knot.  No problem.  There is no "wrong", remember?

To get the two-look in the knotted section after the diamonds, I used one green and one blue cord for knotting square knots.  It's kind of fun and different.  Then after the white bead (hiding my transition), I did square knots with blue cord around the green.  I slipped an 8/0 white seed bead on the outer (knotting) cord on each side between the square knots. 

The funky striped bead you see next is a Kazuri bead.  The hole was large enough to get all four cord through and again, it hides my transition to knotting a half knot spiral with the green cord. 

Macrame wrap bracelet tutorial by Sherri Stokey of Knot Just Macrame

Still with me?  Ready for more?  If it seems like your bracelet is getting really long, that's good.  Mine was about 30" finished, which allows me to wrap it around my wrist  four times.  My wrist is only 6" so you would think this would be too long, but it isn't.  You have to allow some for the bulkiness of the beads and for the bracelet wrapping over itself on your wrist.  As you're going along, try wrapping it on your wrist to check the length now and then.

So, back to the instructions.  Green spiral, then some lampwork beads with overhand knots in between followed by another spiral, this time using one green and one blue cord (when you're choosing the cords to knot with, choose the longest ones - a couple will be shorter if you did the two color knotting up above).  Overhand knot at the end of that section, then beads with a couple square knots between.  Bead to hide transition and back to knotting with the other color.

OK, now we're to the circle.  I took one green cord and one blue cord down each side of the circle and made larks head knots alternating colors.  So I did a blue larks head and then pulled the green cord from behind and tied a larks head with it.  When I got enough to cover the ring, I pulled all four cords together and started square knotting again.  You can totally skip this part if you don't have a ring the right size or if you're still not sold on larks head knots.  Totally up to you.

When you get a couple of inches from the length you want, it's time to add the button.  In this case I used a plain old four hole button.

Macrame wrap bracelet in blue and chartreuse

I took both green cords up through one hole and down through another and did the same thing with the blue.  Now pull the button down the cord or pull the cords tighter - whatever it takes to get the button in the right place for the length you want.  Now you should have your long knotted strand and then the four bare cords showing AND the four cord ends hanging around in the same place, then the button on the very end.  Take two of the longest cord ends you have left and use those to make another square knot length - this time starting up by the button and covering all those loose cords.  Make sense?  This part will be a little fatter, since you have more "filler" cords, but this whole look is about imperfect, so don't sweat it.  Once you've knotted an inch or so, you can cut off the loose ends of your filler cords (it won't hurt to add a dab of glue in there if you're paranoid like me) and finish knotting until you meet the knotting where you left off, covering up all the bare cord.  Tighten the last knots up well and hit them with a little glue.  Trim off excess.

Whew.  Making this is WAY easier than talking you through it, lemme tell ya.  Short recap:

Two 150" cords, fold in half and make a loop (any kind you like).  Knot your bracelet, alternating colors and knots with random beads or whatever strikes your fancy.  You can make long sections of the same knot or you can make short ones or you can mix them up.  Beads are handy for hiding places where you switch knotting cords.  When you get the length you like, add your button or bead and fine tune length.  Continue knotting under the bead or button back toward the bracelet to cover the cords.  Glue.  Cut.  Wrap it around your wrist, throw your first in the air in victory and go show everyone you know what you made.  

And come back and show me what you do!  Or swing by my Facebook Page and post a photo.  Or just say hi.  Or heck, mock my tutorial - whatever feels right :) 


Playing Catch-Up

$
0
0

Baby sized distraction

I've been juggling quite a few things lately, not the least of which is this little guy - my grandson, Carter.  When it comes to choosing between making jewelry and playing with him, he wins ever time, so I've gotten a bit behind on posting my Year of Jewelry projects.  I have been making them, though, all except for the personal talisman one from several weeks ago that I'm still pondering.  Anyway, Week 19 was My Favorite Flower and I made an appropriately floral piece:

White bridal micro macrame beaded bracelet by Knot Just Macrame

I had June brides in mind when I made this bracelet.  It's knotted in white superlon bead cord and accented with white Toho seed beads in different finishes and sizes.  The cascade of lucite roses puts it over the top, I think.

The theme for Week 20 was Made in 10 Minutes.  Whew - this one was hard for me!  I can't even cut the cords for a pair of earrings in much less than that, so micro macrame was out.  I tried a couple different pairs of earrings and they were okay, but nothing special.  I just don't feel like I've put in an effort if it only takes 10 minutes - KWIM?  And then... it hit me...  

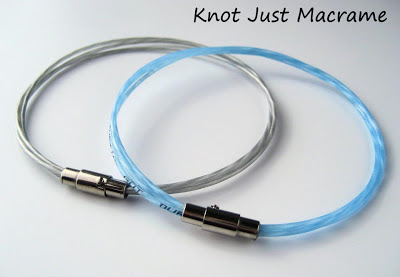
Tennis racquet string ankle bracelets anklets by Sherri Stokey

I made a prototype tennis racquet string ankle bracelet for my tennis playing daughter a couple of months ago.  Since then she's been wearing it non-stop.  She wears it to her morning workouts three days a week and to tennis practice every day after school.  She wears it in the shower and through all day tennis tournaments.  This baby has been through the wringer!  The clasp is magnetic, but also has a twist lock so it is pretty secure.  It has come unfastened a couple of times over the weeks, but given what it's gone through, I think that's pretty good!

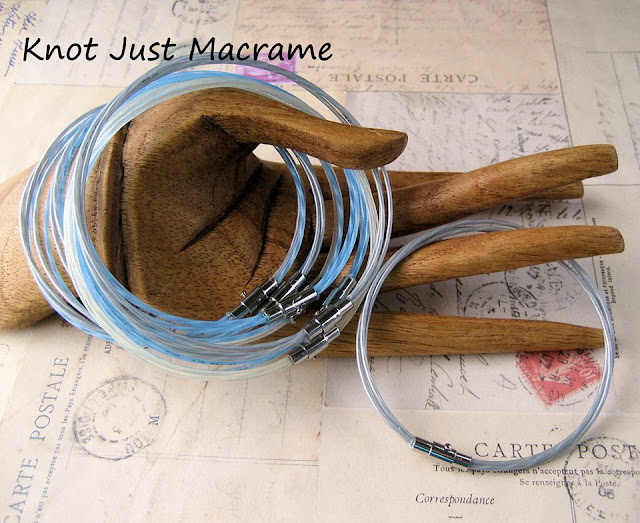
So my Made in 10 Minutes Week 20 project was to make some non-prototype anklets.  I used three colors of string in different solids and combinations and made a handful:

Tennis racquet string ankle bracelets anklets with magnetic clasps

Which took longer than ten minutes *sigh*.  But I could have made one in ten minutes, probably, so I'm counting it.  Week 20 - Done!

Year of Jewelry Week 21 - Cuffs for All

$
0
0
 
The theme for Week 21 of the Year of Jewelry was Cuffs for All.  I had difficulty coming up with a macrame piece without a closure/clasp, so my take on a cuff?  A bracelet that fits like a cuff.

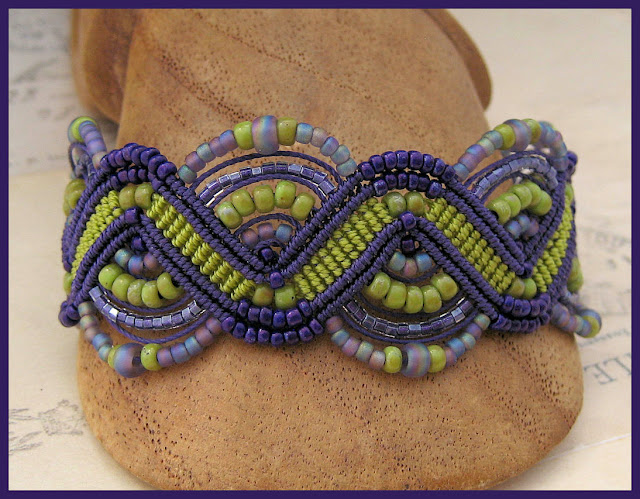
Micro macrame bracelet in chartreuse green and purple by Sherri Stokey

I've been making some pieces use the Superlon fine bead cord - it's almost half the size of the cord I usually work with, which is pretty tiny.  It does, however, allow me to use more cords in my designs without the resulting piece being too big and clunky.  I made this design by adding a couple of cords running through the center of my zigzag bracelet and I really like the effect.

Micromacrame bracelet in chartreuse green and purple from Knot Just Macrame

I am loving the color combination, too.  I love to pair chartreuse with different things, but this green and purple is a classic.  I did do another bracelet in this design my usual size bead cord.  How's this for some summery color?

Superlon bead cord and glass seed beads

And from that, I made these:

Beaded macrame jewelry by Sherri Stokey - earrings and bracelet

Yes, I've been a busy bee.  And I still have lots more ideas, so stay tuned!

Year of Jewelry Week Week 22 and a Lesson on Bead Cord for Knotting

$
0
0
Micro macrame bangle by Sherri Stokey of Knot Just Macrame

Our theme for this week at the Year of Jewelry is Circles, Squares, Triangles and I found this great bangle with a square bezel to inspire me.  I used Superlon MICRO bead cord to make an itty bitty piece of macrame, and believe me, keeping that tiny stuff straight is a challenge.  I used 42 cords to make this piece and it's slightly under 1.5".

Micro macrame knotting in Superlon Micro Bead Cord S-lon

To give you some perspective, let me show you the four different weights of Superlon cord:

Superlon or S-lon bead cord in micro, fine, regular and heavy weight

The first spool in turquoise is the S-lon Micro Bead Cord.  It has a diameter of .115mm and there are 287 yards on that spool.  The next spool in blue is Superlon (or S-lon) Fine Bead Cord.  It's somewhere between the Micro and the plain old bead cord and has 118 yards on a spool.  The lilac colored cord spool is the stuff just called Bead Cord (no micro or fine in the title).  This is the weight that I usually use for micro macrame.  It's .5mm and there are 77 yards on that spool.  The last spool in chartreuse is the Superlon Tex 400 cord.  It's .9mm and comes in a 35 yard spool.
The bead cord was the first weight introduced and is available in the most colors.  It will go through most 11/0 seed beads once (as long as you are using quality seed beads like Miyuki or Toho).  The weight and size are really nice for the jewelry pieces I usually make.
The heavier Tex 400 cord is almost twice the thickness of the regular stuff.  It works well for pieces like multi strand necklaces and for bigger, chunkier pieces.  
Close up of different sizes or weights of bead cord for micro macrame
 
Fine bead cord isn't that much smaller than the regular bead cord, but it feels very different in finished pieces.  Bracelets made with this cord are more flexible and feel more "slinky", if that makes any sense.  
Micro cord is almost like thread.  It is really small.  I can't imagine trying to knot a whole piece using this weight of cord, but it is excellent for fine detail work and makes awesome focal pieces.  I did the same pattern for the pieces in the next photo, but used Tex 400 for the ecru colored one, regular bead cord for the one in purples and micro cord for the little piece. 
Pieces of macrame knotting in different cord weights
There.  Now you're an expert on bead cord and you can better appreciate the fact that the macrame piece on this bangle is 1" square.

Micromacrame knotting in micro bead cord set in bangle bezel

Micro Macrame Bracelet Tutorials Available

$
0
0
Micro macrame bracelet tutorial by Sherri Stokey of Knot Just Macrame

I did it!  I finally sat down and wrote a tutorial for micro macrame!  I knotted this bracelet and took photos every step of the way and then sat down and wrote instructions for the photos.  This tut has 14 pages and includes a whopping 39 photographs.  I get lots of questions on how I finish micro macrame, so I spent four pages covering that in detail.  This is an example of the photos you'll find included:

Example of photo in tutorial with instructions and pattern for micro macrame jewelry bracelet

This bracelet uses only the double half hitch knot, except for the few knots to attach the split rings at the end.  That's it - you just have to learn ONE knot.  You can do that, can't you?  I didn't include instructions for that in the tut (it was already 14 pages!), but I did find loads of places online where it's covered, including a You Tube video by Ms. Joan Babcock (the macrame master!).

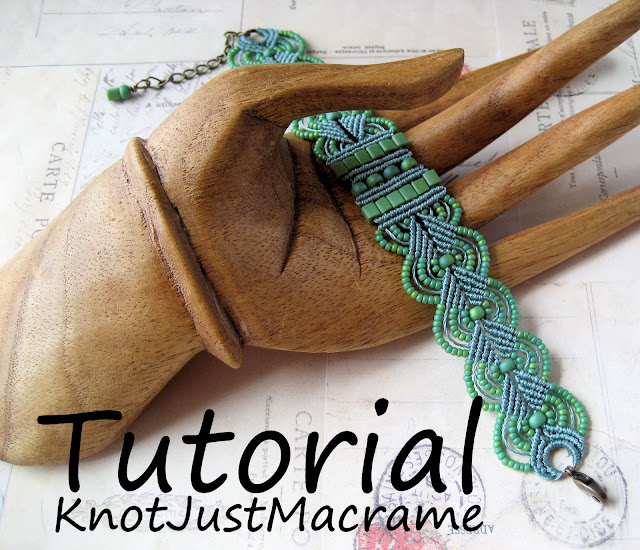
So go practice your knots and when you decide you're ready to try a bracelet, you can find the tutorial for sale here.  And that's not all!  There's a tutorial right next to this one... for this beaded macrame design:

Beaded macrame bracelet tutorial by Sherri Stokey of Knot Just Macrame

Yup.  It's been a busy week.  Oh, and for those of you who don't want to try knotting your own?  Both of these bracelets will be available in my shop soon.  I aim to please.

Micro Macrame Earrings - Week 23 of The Year of Jewelry

$
0
0
Micro macrame earrings by Sherri Stokey of Knot Just Macrame

I can't believe we're up to Week 23 of The Year of Jewelry already, but it's true.  One new piece of jewelry, every week, for a year.  No problem!  The suggested theme for this week was Twins, but I always have to be me - just a little bit "off" from the rest.  I decided to make earrings, but just for fun, I added the interesting little twist of different cord colors.  Well, not actually different cord colors - I just reversed the cord colors.  So one pair had green cord with a pop of purple and the other has purple with green.  

Beaded macrame earrings by Sherri Stokey in green and purple

I can't believe how different they look with only that one change.

Knotted macrame earrings in purple and green from Knot Just Macrame

The beads are all the same, I swear.  Anyway, that's my take on "Twins".  Oh, and if you're diggin' the purple and green color scheme, check out the matching bracelet here!

Hints & Tips for Micro Macrame Knotting

$
0
0
Micro Macrame bracelet by Sherri Stokey of Knot Just Macrame.

Want to take your micro macrame pieces from so-so to WOW!?  There's only one rule you have to remember - neatness counts.  That's it.  That's the whole secret to great looking beaded macrame jewelry!  Make sure your knots are straight and even and your cords lay just right and your beads make the perfect curve.  Pay attention to the little details.  A few other tips:

Use a straight iron to smooth out cords for micro macrame.

The first thing I do when I'm making something (okay, the second - first you have to cut the cords) is to iron my cords.  Yep - I take a straight iron and run my cords through it.  As you can see from the photo, you can quickly tame an unruly pile of curls.  It's much easier to keep track of your cords when knotting if they aren't all kinky and tangled.  A big barreled curling iron will do the same thing as a straightener if you don't curl your cord around it - just pull the cord through it.  I've also heard that you can iron them, but I can't vouch for that.  "Ironing" is a bad word at my house.

Straight pins and t-pins used to hold micro macrame knotting in place

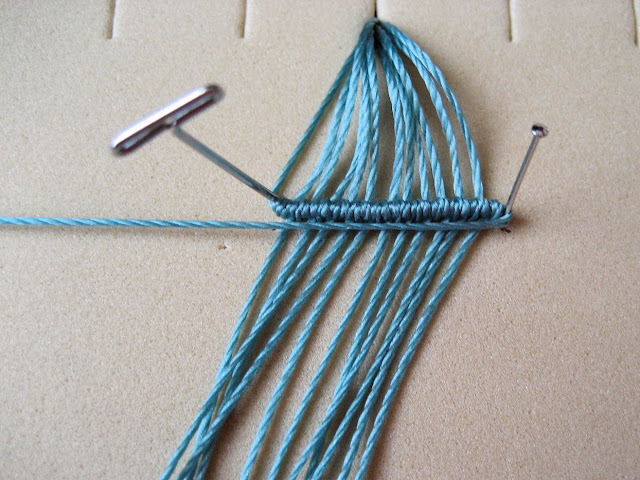
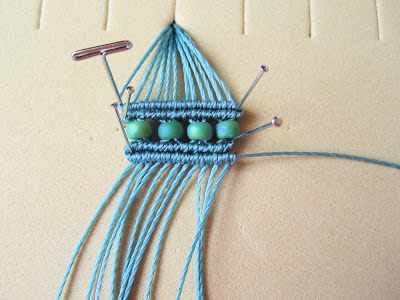
The next secret weapon in my arsenal is pins.  I use a couple different kinds of pins - plain old straight sewing pins and small t-pins.  They will hold your work in place while you knot.  My rule of thumb is whenever I change the direction of a cord, I use a pin to make the corner sharp.  It also helps to keep my lines straight.  

Straight pins and t-pins used to hold micro macrame by Sherri Stokey

You can never have too many pins.  The work surface I'm using in this photo is the new Beadsmith Macrame Board and it works very well.  I do still use my original, low cost cork board, too (old dog, new tricks thing I think) and you can see that here.

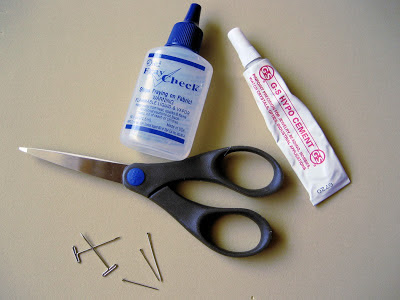
Glue, scissors and pins are handy tools for micro macrame knotting

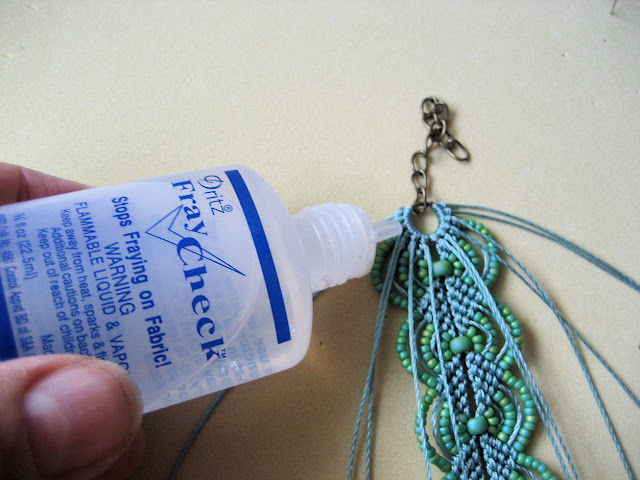
My secret for a nice finish involves two types of glue and small scissors.  The old school method for ending cords was to melt them with a lighter and I know some folks still do that.  It works, but I don't like the hard scratchy ends of melted nylon that are left (okay, they drive me crazy on the tender underside of my wrist!) so I use this method.  When I'm finished knotting, I coat my last row of knots with Fray Check.

Using Fray Check to hold knots

Then I pull all the knots nice and tight and let them dry.  I clip the excess cord very close to the knots and then hit those knots again with some glue.

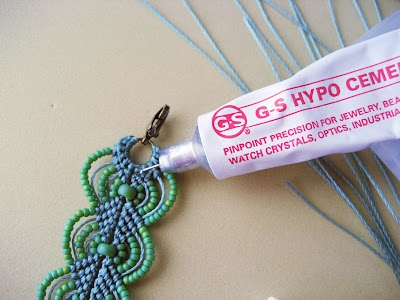
Hypo Cement is a great adhesive for holding knots.

I like the G-S Hypo Cement for this step.  I've never had a problem with it not holding and the precision tip applicator lets me get the adhesive just exactly where I want it without making a mess.

So there you have it.  My secrets. If you're ready to try making some micro macrame bracelets of your own, I offer some tutorials in my Etsy shop with step by step instructions.

Viewing all 283 articles
Browse latest View live