Quantcast
Viewing all 283 articles
Browse latest View live

Micro Macrame Inspired by Downton Abbey


Downton Abbey is one of my absolute favorites - even if I am still mad at them for killing of Matthew last season.  Besides getting wrapped up in the characters' stories, I get lost in the period setting.  The scenery is amazing and the styles are sublime.  See - I'm getting a little giddy just writing about the show!  So when one of my favorite bead stores, Bello Modo put out a challenge based on Downton Abbey and Vintaj, I couldn't resist.

A waterlily ribbon slide by Vintaj became my focal, and to tie it in a little with my cord color, I hit it with some gilders paste.  I think it really shows off the graceful curves of the piece.


I echoed some of the curves in the micro macrame band, and accented it with vintage Venetian seed beads and some really old (antique?) glass seed beads of unknown origin (maybe French).


Using vintage beads was very different than the precise Japanese seed beads I usually use.  They are very much more imperfect both in cut and color distribution, but really like the feel they bring to this piece.


Even though neither Vintaj nor nylon bead cord were available during the time period, I had great fun with the inspiration.  And it was a great excuse to finally use some of the vintage beads I've been hoarding!


Article 2


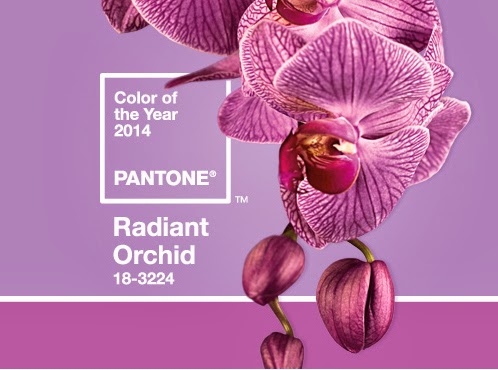
Pantone's color of the year for 2014 is a vivid Radiant Orchid and I've been playing a bit with the color.  My first piece was a simple four part braid just to see how the the different shades work together.


I felt like my warm up piece read a bit too pink, so for my next piece, I concentrated more on the purple side of things.  I knotted a spiral using three shades of orchid and a bit of olive for some contrast.


I tied on a pendant with a polymer clay bead by Barbara Bechtel and a pendant by Humblebeads.


The bead caps I found mimic the flower petal/leaf theme.


The floral motif is topped off with the sterling silver clasp.


And the finished necklace looks like this:


Red!?! Oh, Horror of Horrors!


When I was asked to work up a couple of micro macrame demo pieces using natural stone beads, I said sure!  And when asked what stone, I said, "Anything as long as it isn't red or orange." As you can probably guess from the post title and the photo above, the beads I received were Mexican Red Snowflake jasper.  RED is even in the name of the stone, for crying out loud.  And if that's not bad enough, it's paired with brown.  *sigh*  Well, I'm not one to back down from a challenge or break my word, so I figured I'd better find some inspiration.  And believe me, I hunted.  I even ended up in the fabric department looking for interesting color combinations and finally found a paisley that added some unexpected coral tones in with the red and brown.  Okay, I'm thinking, I can work with that.  So I dug through my stash and came up with this:


Now we're talking.  My next challenge was to fit my cord through the beads.  One cord would pass easily through all of them, but for the design I had in mind, I needed to get two cords through the hole.  Uh, huh.  I resorted to dipping my cord ends in Fray Check, which I don't usually have to do any more, and I had to use the bead reamer on a couple of the beads, but I did get them to work.


Well, now.  That's kind of interesting, if I do say so myself!  The central stones are 8mm and the ones around that are 4mm.  I used dark red, brown and a peachy shade of cord and accented with glass seed beads in dark red, peach and coral-lined crystal.  Then I had a thought (shush - it happens!).


What if I brought a little turquoise color to the party?  


I heard a choir of angels singing in the background, I swear I did.  Now that's my style - even with the natural stones and the warm colors.  I won.  I worked through it and conquered my fear.  I am triumphant!  Okay, so maybe it's not as good as curing cancer or making it to the top of Everest, but I'm feeling pretty good and I take that wherever I can get it.


And now, I think I'll reward myself by snuggling up in a blanket on the couch in front of the fireplace and watching a cheesy movie.  Hopefully I can find something with dinosaurs.  Or ancient Egyptians.  Or ghosts...  

A Micro Macrame Fairy Tale


Once upon a time in the farthest reaches of a a faraway land, there lived a dragon.  She was a beautiful, wild creature who hunted in the craggy mountains and made her home in a rocky cave.  Her graceful body was covered coppery scales which perfectly camouflaged her sinuous curves and sweeping wings.  But she was far from dull, this coppery dragon, for when the sunlight caught her body just right, she shone with golden hues and glints of pink and blue and green.


This dragon thought hers was the perfect life.  The perfect setting, the perfect coloring - everything a dragon should be.  One day this dragon decided to venture further into the kingdom and what she found amazed her.


Everywhere she looked, she found dragons in magnificent colors, with brightly colored scales and feathered wings.


And each of these new dragons thought it was the perfect dragon.  Perfect in every way.  The first dragon was so dazzled by the beauty of the others that she began to doubt herself.  She forgot what a fierce and powerful hunter she was, how cunning and smart and perfectly suited for her life.  She compared herself and felt inferior.  

And the moral of this dragon's tale?  We must never forget that each and every one of us is perfect - just exactly the way we are.  Perceived flaws and all.  We are all different and we are all perfect.


If you look for the flaws, you will find them.  And if you search for the strength and beauty, you will find that instead.

A New Micro Macrame Tutorial


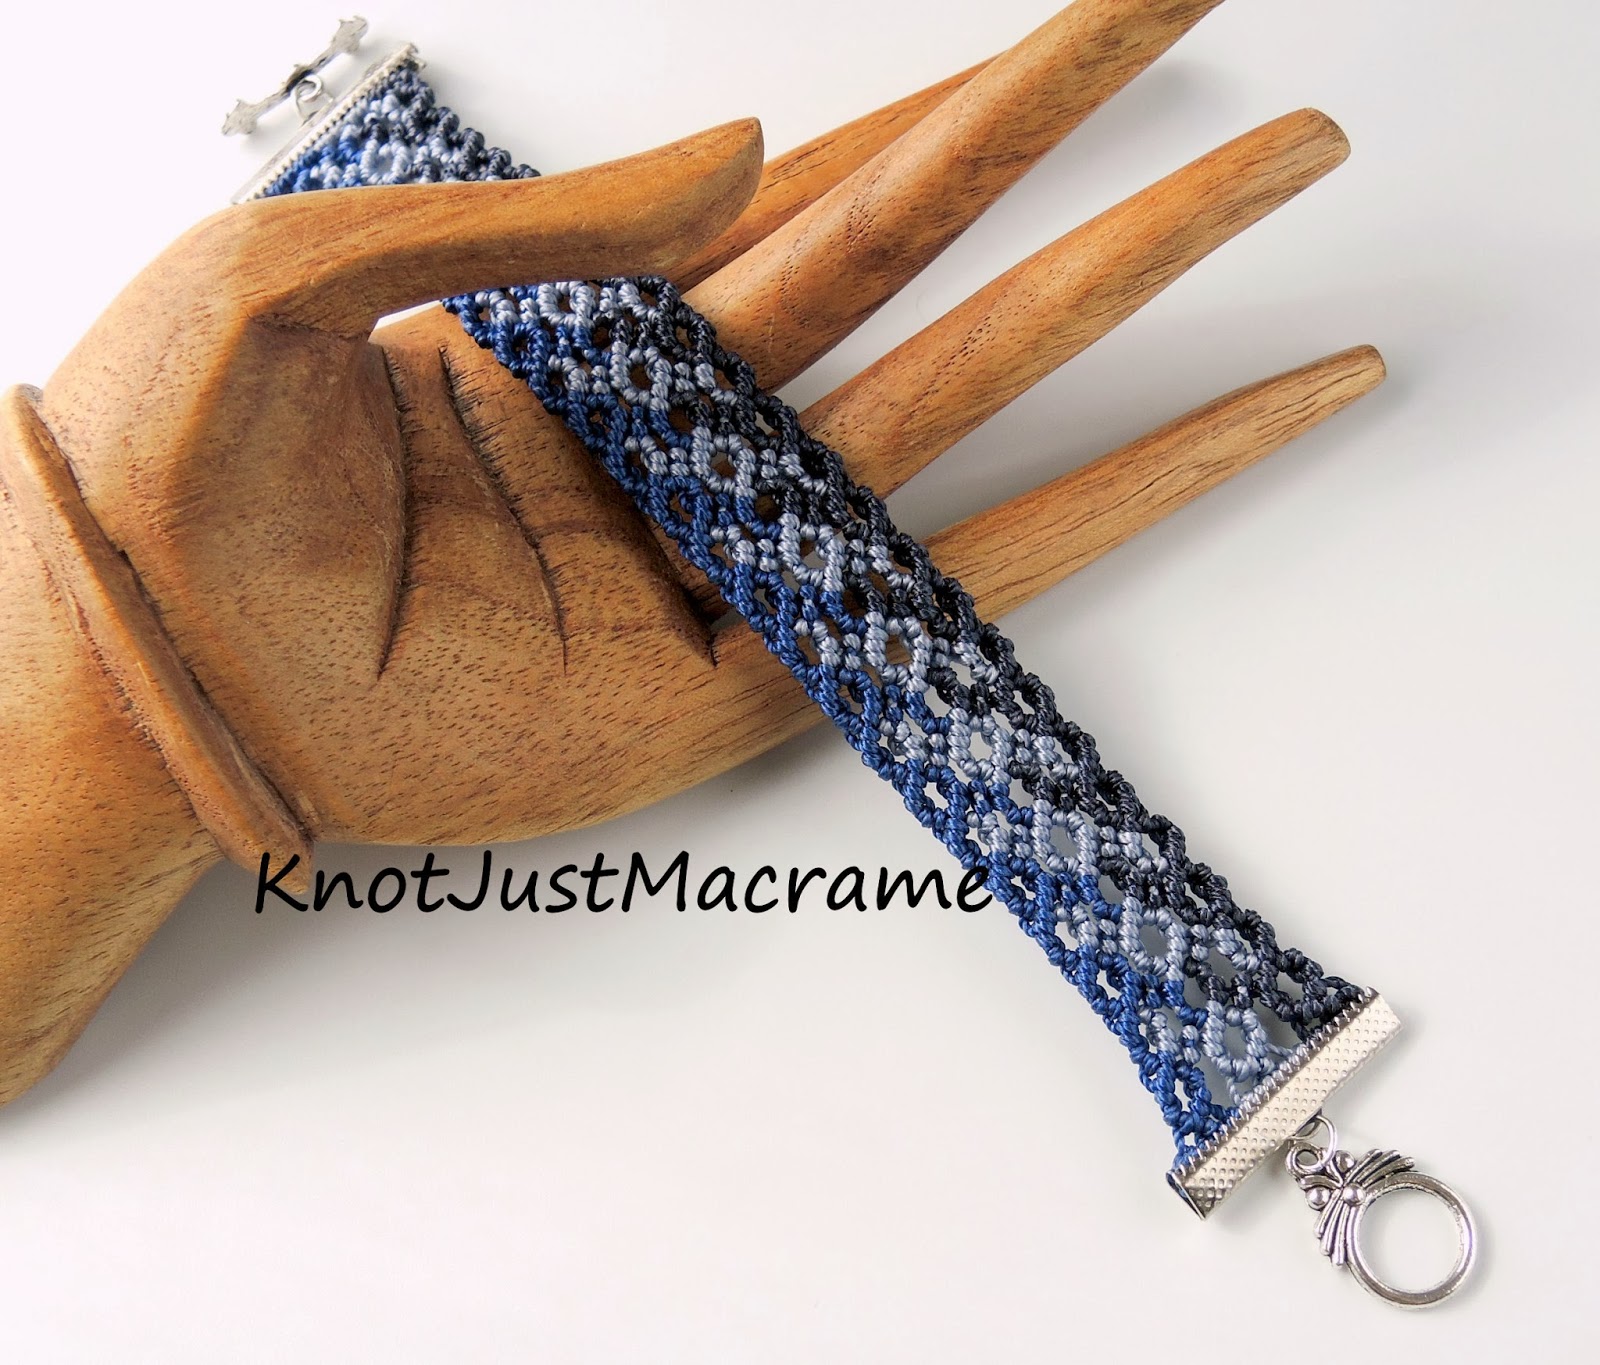
It's been a long time coming, folks, but I finally finished a tutorial for a version of the Curves micro macrame bracelet!  This one is knotted in Tex 400 cord for a nice beefy bracelet.  


The whole bracelet uses only ONE macrame knot.  Yes, really - only double half hitch knots (which you can learn how to make here).  You make them backwards and forwards and every-other-wards, but it's still only ONE knot.  


I finished off this design with some clamp ribbon ends for a nice, neat look and added a simple toggle clasp.  A lobster clasp also works nicely.  


This is an example of one of the photographs from the tutorial.  I took a million photos... okay, that might be a bit of an exaggeration, but I did include about 70 photographs in 24 pages of step by step instructions.  I'd probably rate this pattern as sort of middle-of-the-road as far as difficulty.  It's not hard (only ONE knot, remember?) but you do have to keep track of the cords that are trying to go off in one direction or another.  If you are comfortable with the double half hitch knot, you're probably ready for this one.


You'll find this new micro macrame bracelet tutorial in my Etsy shop here.  Happy knotting!!

An Easy Micro Macrame Earring Class


If you're looking for an easy little project, these micro macrame earrings might be just the thing for you.  My new class at CraftArtEdu.com covers how to make them, step by step.  I've included videos and scads of photos like this:


I get so up close and personal in the photographs that you can detail every broken fingernail, dry skin cell and hangnail.  What can I say - I suffer for my art.  There are even some really nice close ups featuring my flesh-toned band aid:


Oh, yeah.  Look at that - that picture is a great shot of the bandage (chopped my finger instead of the celery) and the great hangnails.  But the need for a manicure aside, the photos in the tutorial will be very helpful in context, I promise.  You'll be making your own little tiny work-of-art earrings in no time.


Just to sweeten the pot a little, the nice folks over at CraftArtEdu.com are having a little sale on not only this new class, but all of my classes there (20% off through midnight CT, Thursday, March 6, 2014).  If you haven't been there to check them out yet, you really should go.  No really, go.  I'll wait here...  


Are you back?  Did you see I have my own little Micro Macrame section over there?  I'm pretty proud of that section.  I've put a lot of time and effort into making those classes the best that I can.  I really do try to make them as thorough and detailed as possible and my goal is to make you feel like you're taking a class with me in person.  BUT... this is even better.  You can pause me and rewind me and replay me all you want and I won't even yell at you.  That's a deal you can't beat.  Add in the 20% off and even I want to buy my classes.

Micro Macrame Without Rules


An experiment in free form micro macrame knotting or a pattern gone horribly awry?  You decided.  I think I like it.  I played around with some free form a while back (remember this post?) and then sort of went away from it for a while.  Here lately I haven't been wanting to conform to the rules of normalcy (go ahead - have your fun with that one).  I've just been sitting down with some string and letting the knotting go where it may.  No plan, no sketch, no preconceived notion of where it might end up.


It feels right.  I love the texture on this turquoise piece and how it somehow feels like beachy waves.  I decided to play up that angle when I added the pop of bright orange with the howlite starfish bead.


This purple number reminded me of a butterfly somehow.  A deformed, modern art butterfly, maybe...  Or a bat.  But it seemed like it needed a little "something", too, so I added a Czech glass flower.  Just one.


I really like how just that one little bead seems like the perfect accent.  The perfect shoes to go with the perfect outfit kind of thing.


If you're looking for me, I'll be over there outside of the box.  Coloring outside the lines.

And Then There Were Owls


Everybody has seen a macrame owl.  If you're of my generation, you probably saw one of them in person.  A great big thing with knots the size of your fist taking up half a wall somewhere (yes, mostly likely surrounded by avocado green and/or gold, but let's not get cliche here).  I thought the poor macrame owl needed a little updating, so I decided to try my own design for one in micro macrame.

  
 This is the first one I made.  He was a little gift for someone.  But you know me - I can't leave well enough alone. I had to try making one in... you guessed it... teal.  Teal and turquoise and tan, actually.


 It is kind of trippy to watch an owl emerge.  It probably wouldn't be such a kick if I had a plan going in, but I'm much more a by-the-seat-of-my-pants kind of gal, so I never know for sure where a piece might end up.  This guy, for example, ended up with a body shape that almost reminds me of a heart.


 I hadn't really seen that coming.  He's a little larger than the first owl, too.  I made him into a necklace and I thought with the size of him, he could stand something fairly substantial.  I dug through my hoard of teal and turquoise colored beads and knotted a fun necklace for him.


It's a bunch of my favorite things all tied together!  I definitely think there are more owls in my future.


My Partner for the 8th Annual Bead Soup Blog Party

I don't know if you know this, but Lori Anderson hosts the party of the year for jewelry designers/bloggers - the Bead Soup Blog Party.  Seriously.  I'd been following her parties before I started this blog and was always so envious because it looked like everyone was having so much fun.  Once I'd started this blog, the first thing I did was to sign up for her next part and I haven't missed one since.  

My partner this year is Marianna Boylan of Star Girl Jewelry.  She says she does some wire work and some polymer work and a "whole lot of glass".  I did a little stalking and boy, does she make some pretty things.  She gave me permission to swipe a couple photos to share with you, so feast your eyes on these:


And you know how I am about beach things, so you can guess how I feel about this set:


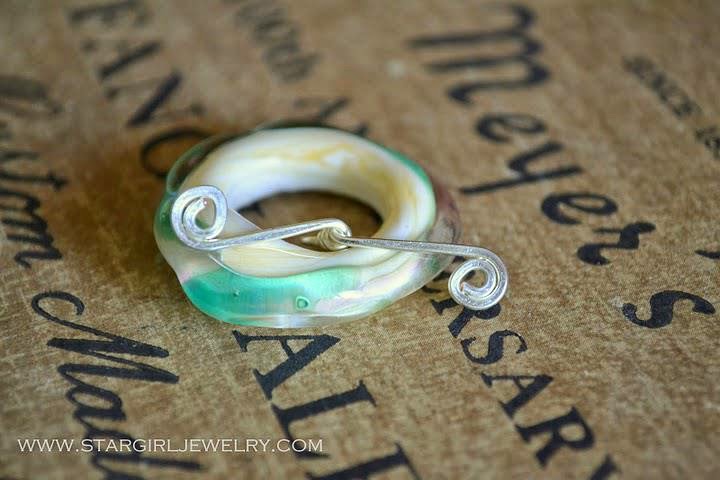
Then I found this clasp and thought I'd died and gone to heaven.


You can find more of her work in her Etsy shop, too.  So what kind of bead "soup" does one send to someone as multi-talented as Marianna.  Good question.  We chatted for a bit and when she mentioned she loves owls, I knew I had the perfect thing. 


The ceramic owl is from SuzieQBeads and I thought it would make a great focal for Marianna.  I added a couple of choices for the clasp - an over-sized brass lobster clasp and a flame painted copper toggle from OregonMadeJewelry.  Then I filled out the soup with an eclectic assortment of beads with everything from Swarovski crystals and pearls to Czech glass and gemstones.  And, of course, everything is in shades of teal and turquoise with bits of tan and caramel because those are my very favorite colors.  This is a soup I would send my very best friend.  Heck, it's a soup I'd love to keep myself!

And remember that first micro macrame owl I made and said it was a gift?  I made it for Marianna.


My soup from her should be arriving any day now, and the mail carrier will probably get sick of seeing me at the mailbox until then.  I can't wait to see what she sent and I can't wait to see what she makes from the soup I sent to her.  The big reveal for the Bead Soup Blog Party is May 3rd, 2014, so mark your calendars.  If you want to know more about the party, Lori has all the details.

If you just can't stand it and you need something to tide you over until the reveal, you can review last year's party. I was paired with the uber talented Julie Cannon of Studio Juls  and you can see what I did with her gorgeous lampwork beads and the rest of what she sent me here.  

It's My Party But the Gifts Are For YOU!


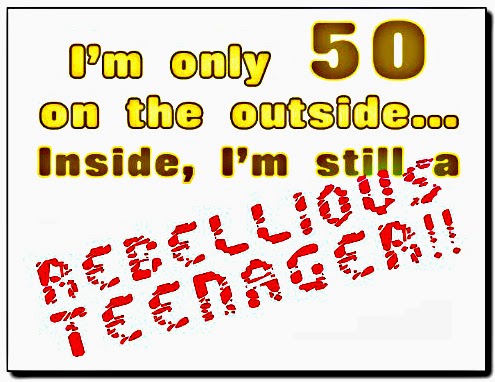
Yep, this is the big one, folks... the dreaded half-century mark.  I've spent more than a few minutes trying to figure out how the heck this happened.  I mean, sure, I knew I'd get old eventually.  I just didn't know it was going to happen quite so quickly.  Somehow the little sands in my hourglass started falling faster and faster and faster and then all of the sudden - POOF!  I'm fifty (pronounced "fiddy" to make it sound more hip and less old).  I'm still trying to process this whole development and decide just how to deal with it.  Part of me wants to go with this:


But mostly, this is how I feel:


Either way, I guess I have no say in the matter.  It is what it is, so let's make the best of it!  PARTY!  Since I can't afford to fly you all here to celebrate with me, here's the alternative:  I'm having a sale.  Now, before you think "big deal, a sale...", stick with me for a minute.  In honor of my 50th birthday, it seems appropriate to have a 50% off sale on all the tutorials in my Etsy shop!  


Yep, that's half off any and all of the tutorials listed in my Etsy Shop, so if there are any you've had your eye on, this is your chance!  But this is a BIG birthday, so I think we need more sale...  How about a discount on top of that?  (By the way, you don't need a code for the 50% off tutorials - they are already marked down for you.)  I'm thinking we'll do an extra 10% off orders over $30 or 15% off orders over $50 (there's that number again!) or 20% off orders over $100!!!  Here are all the codes from which to choose:


The small print (in regular size print, actually, because we 50-year-olds can't read that itty bitty stuff):  code must be entered at checkout to receive the discount, not applicable to previous orders, codes expire at midnight on 3/24/2014.

Now back to the PARTY!  What's a party without a gift?  I think we should have a giveaway gift, so here it is:
This little guy is about 4.25" from the top of his head to the bottom of the tail (tassel?).  I knotted him in nylon bead cord in a light and a dark purple and chartreuse green for some fun.  He's got tagua nut beads for eyes and a sweet little rice pearl for a beak.  The length of the necklace is 16.5" (not including the owl pendant) and the lobster clasp is sterling silver.  Want another look?


Yes, folks, this handy-dandy, super-duper, one of a kind (so far at least), original design from Sherri Stokey of Knot Just Macrame micro macrame owl necklace is going to belong to one of you when this party is finished.  And you don't even have to stay and help clean up to win him.  Just enter with the widget below and when March 26th rolls around, I'll pick one lucky winner.  Good luck!

a Rafflecopter giveaway


The Winner of My Micro Macrame Owl Necklace is...

Soup's On - Bead Soup, That Is!


Woohoo!!!  Check out the loot my Bead Soup partner, Marianna Boylan, sent to me!   There are pearls and dragons blood jasper and sparkling crystals and I love the little flower on the metal branch.  That ceramic mermaid pendant is by Gaea, and the lampwork was done by Marianna herself!  Let me get you a closer shot of the lampwork glass bead.


Isn't that pretty!  See I told you she was talented.  Well I did!  You don't remember that part?  Really?  Go back to this post and reread it.  I'll wait here until you get back so I can say "I told you so".  And be sure to come back on May 3rd to see what I made with my soup!

Experimenting With Epoxy Clay


I have supplies stashed around my house for projects I really want to try.  Someday.  That darned loom is taunting me from the corner of the closet and the torch fired enamel supplies have clearly demonstrated their superiority over me.  The kumihimo disk, on the other hand, is just hanging out waiting patiently.  I like that in a craft supply - patience.  

At one point I decided I'd have to give polymer clay a whirl.  I mean, some of those talented folks make it look so darned easy, surely even I could make something passable.  Right?  So I rushed out and bought some clay paraphernalia (okay, mostly I rushed to my laptop and ordered it, but I will admit to taking some liberties in the name of good storytelling). While searching for all the things I had to have, I came across epoxy clay and thought I had to have some of that, too.  

Months passed and more months and more months and..  well, you get the picture.  I actually did get a package of polymer clay out at Christmas time intending to make an ornament to preserve my grandson's adorable little hand print for posterity, only to discover that it was hard.  Well, I guess it took the pressure off me to use it, huh?

Anyway, I got a wild hair the other day and decided to mess with the epoxy clay.  Apparently since it's packaged in two parts that have to be combined before it will harden and set properly, it has a longer shelf life than polymer?  I don't know that for a fact, but my epoxy stuff was fine.  I worked the two parts together, then rolled little pea-sized balls and pressed it into bezels.  To get a smoother surface and get rid of any fingerprints, I dipped my finger in a little water and rubbed it over the surface of the clay.  It seemed to work pretty well.


You might have noticed the rather impressive array of mineral powders in that first photo at the top of this post?  That was another little collection/obsession of mine - mineral makeup.  I don't know why I thought I needed to have every color under the sun, nor why I hung onto it for all these years.  Apparently it was just for this project.  I smeared it on the surface of the clay and did some rather impressive blending, too.


I used some stamps I had laying around here to stamp a design into each of the little charms.  I didn't have too much trouble with the stamps sticking in the clay, and that might have been because of the mineral powder.  I even dug out my letter stamping set and stamped words into the clay on some of the pieces.


I really like the sheen and the subtle colors, but I was hell-bent on experimenting and using more of my craft supplies, so I busted out the Vintaj patinas.


These I have used before.  I even used them to paint lucite flowers and wrote a little step by step you can find here.  I don't profess to be any kind of artist when it comes to painting, so I didn't attempt anything too complicated.  Mostly I just covered the charms in patina then wiped it off.  After that I hit the high points with a little sanding to reveal some of the clay color underneath.  I did get some nice results with that.


All in all, I think the experimentation was pretty successful.  I probably should have taken pictures of some of the not-so-successful pieces, but hey, it's my blog.

TWO New Micro Macrame Tutorials!

Yes, I know it's been over a week since I last posted, but in my defense, I have been busy.  I finished not one, but two new micro macrame tutorials!  I finally finished one for the bracelet in the photo above - the one I've been promising for a couple of months now.  I couldn't decide what to call it, because "Funny Little Pointed Elliptical Shapes Micro Macrame Bracelet Cuff" just seemed to be missing something.  I finally figured out that those shapes look like a marquise cut stone and logically, if somewhat predictably, named the class "Marquise Micro Macrame Cuff".  It's a little more manageable.  I have included something like 110 still photos and 5 videos along with step by step instructions and narration.  No matter what method of instruction works best for you, it's in there!


To give you a little taste of my teaching style, here's an example of one of the videos showing how to mount the cords to get started on this design:


The Marquise bracelet is a bit of a challenge.  It only uses a couple of knots, but it takes some concentration to keep track of the cords and make sure you are working with the correct ones.  If you don't think you're ready for that, I also did an easier class:


The Micro Macrame Stack Bracelet Class is easy enough for beginners.  It looks like a stack of several bracelets, but it's really one easy-to-wear piece.  I love how the simplicity of the square knots really lets the colors take center stage.  The bracelet I made while taking photographs for the class was done in five graduating shades for an ombre effect, but you can vary the color scheme to fit your style.  Try springy pastels or a bright colorful rainbow or experiment with adding beads into the mix.  You can even substitute a different knot and make a bracelet like this:


The nice folks over at CraftArtEdu.com are celebrating the release of my two new classes with a super duper sale through the weekend.  You can find the details here.  Happy knotting!


Collaboration


Melinda Orr of Melinda Orr Designs makes the most awesome components for jewelry makers in addition to her jewelry designs.  She does some amazing things with metal (I've had my eye on these textured components with patina forever), and now she's branching out into leather.  I was looking for a clasp that would work for micro macrame and just look what she came up with:


Is that great, or what!?!  She was even kind enough to send me a couple and I won't lie... I was as excited as a kid on Christmas morning when they arrived.  I took my color cues from the green foliage pattern in the leather and paired that with the spring vibes I've been feeling and came up with a lilac color scheme.


This pattern takes a long time to knot and adding a bead in the center of each of the shapes drug that out into eternity.  I do think it was worth it, though. 


Even the back side of the bracelet is cool:


If you would like to try your hand at this pattern, you can find a version of it in my Marquise Micro Macrame Cuff class on CraftArtEdu.com.  If you are interested in some of Melinda's components, you will want to check out her shop.   I'll show you the other things she sent to me, but you have to promise not to be jealous.  Promise?


Those little circles?  Those are OWL EYES!!! How cool is that!  I can't wait to try them out in an owl design.  And I definitely will be ordering more clasps!


Beads of Clay Artisan Beads


The members of the Beads of Clay group did a giveaway a few weeks ago and gave away an incredible array of handmade artisan clay beads.  Take a look:


You might recognize the work of some of these talented folks:  Vladislav Ivanov from Golem Studio, Beada Hendrix of Sasijuhls Things, Diana Ptaszynski of Suburban Girl Studio, and Tracee Dock of Classic Elements.  


The "catch" that went along with winning these beads was that I had to agree to make a piece of jewelry using one of the beads within a month of receipt.  Don't tell anybody, but with this kind of inspiration, that wasn't really much of a catch!  What was harder was trying to decide which piece to work with first.  

I ended up choosing the largest focal piece by Tracee and I set it in the center of a micro macrame bracelet with cord and beads in shades of blue and mauve.


It's a real pleasure for me to work with artisan beads, handmade by people who take pride in their work and produce unique and beautiful beads.  I may or may not have a shopping problem, but that aside, I can tell you that I recognize the work of these folks by their own individual signature styles.  And to me, that's a mark of a true artist.  It's obvious they are each doing what they feel passionate about and creating pieces that mean something to them.  I admire that greatly.  I hope you will take a couple of minutes to visit the pages and shops of these folks and support them.


Artists' Charm Swap 2014


Bead Swap USA usually does a swap once a year or so where the beads or charms have to be handmade by the participants.  It is my very favorite swap!  It took me awhile to get brave enough to participate because I'm not a bead maker by any stretch of the imagination, but I am so glad I got up the courage!  It's not only encouraged me to try a some different techniques to make my own charms, but it's also netted me some awesome handmade charms from others!!

This year there were 27 of us and we (bravely) decided we would keep it all as one group rather than splitting it up.  That meant each of us had to make 27 charms, which isn't too bad for some techniques, but for others like bead weaving...  Boy, those ladies are incredibly brave to even try to take on a project like this one.  My hat's off to them!


See?  I told you there were some really cool charms!  And there were also several lamp work and ceramic ones:


We have some folks in the group who work with polymer clay or resin:


And there are still more!!!  Here are the offerings in the metal, wire and soldering category:


A few of those pieces were "extras" added as hostess gifts and a couple others were from another swap in that group, but mostly they are charms from this swap.  Pretty cool, huh?  

The charms I made this year were epoxy clay and that was a first for me.  It was lots of fun and I did a post about it here.

I made a charm bracelet using some of the charms from previous swaps and a few other treasured pieces.  It's really jangly and noisy and fun to wear and each one of the charms on it has special meaning to me.  It doesn't get much better than that!  If you'd like to see who gave me the charms on the bracelet, I've tagged them here.


Think I can find room on there for my new treasures?


Riding the Waves, Swept Along in the Tides


I'm trying really hard to go with the flow; trying my darnedest to relax and enjoy life and let it happen.  Today is my daughter's very last day of high school.  It doesn't seem possible.  I swear it was just a few months ago that she was heading off to her first day of kindergarten!  
 
I couldn't figure out why I've been so exhausted lately and then it dawned on me:  I've been trying to keep up with her!  She plays tennis, so I try to go to all her matches.
 
 
She just finished up with Speech and Debate a month ago and dove right into the spring play.


Then this past weekend she went to Prom.  I baked and decorated a cake so they could have an elegant dessert for their pre-Prom dinner, and took her to get her hair done and helped her get ready.  After helping with the dinner, I had to go to the grocery store again and get ready for the second wave - I served breakfast for her and her friends at four in the morning!  She had such a good time, though, that it was all worth it.  And she looked so beautiful!


And if all that isn't enough, this coming weekend is graduation.  I'm too old for all this excitement!  And I'm tired :)

I haven't had time to do very much with my jewelry lately and that's a bad thing.  Micro macrame is how I relax and I feel so much better when I get a little "me time" in.  So after I served breakfast (and took a little nap - don't tell on me), I spent the afternoon doing this:


Ahhhhh..... it's like a trip to the beach.  Soft sand under my toes, sparkling teal waters...  It's my happy place.  Nothing to do but relax and sip my margarita.  A girl can dream.


It's PARTY Time! Bead Soup Blog Party 8 Reveal


It's finally here - the big reveal for Lori Anderson's 8th Bead Soup Blog Party!!  This is an event jewelry makers like myself anxiously await all year.  It's like the Thanksgiving of handcrafted jewelry where you can gorge on images of beautiful pieces until you can't stand it anymore.  It's like mardi gras and New Year's rolled into one.  Can you tell I'm excited?  If you're not familiar with the concept (Bead Soup Blog Party, not parties in general), it's pretty simple:  our hostess-with-the-mostess, Lori Anderson, assigns partners from the massive list of participants; the pairs exchange "bead soup" consisting of a focal, clasp and a few coordinating beads; each designer makes something using at least the focal and clasp (they don't have to be used in the same piece); and then we have a party!  This is where you get to see all the amazing things everyone has made.  

This year I was paired with Marianna Boylan of Star Girl Jewelry & Lampwork Glass Designs.  I did this blog post all about her, in case you missed it.  She sent this gorgeous "soup" for me:


Marianna made the lampwork bead and that photo doesn't really do it justice.  I'll give you a closer look:


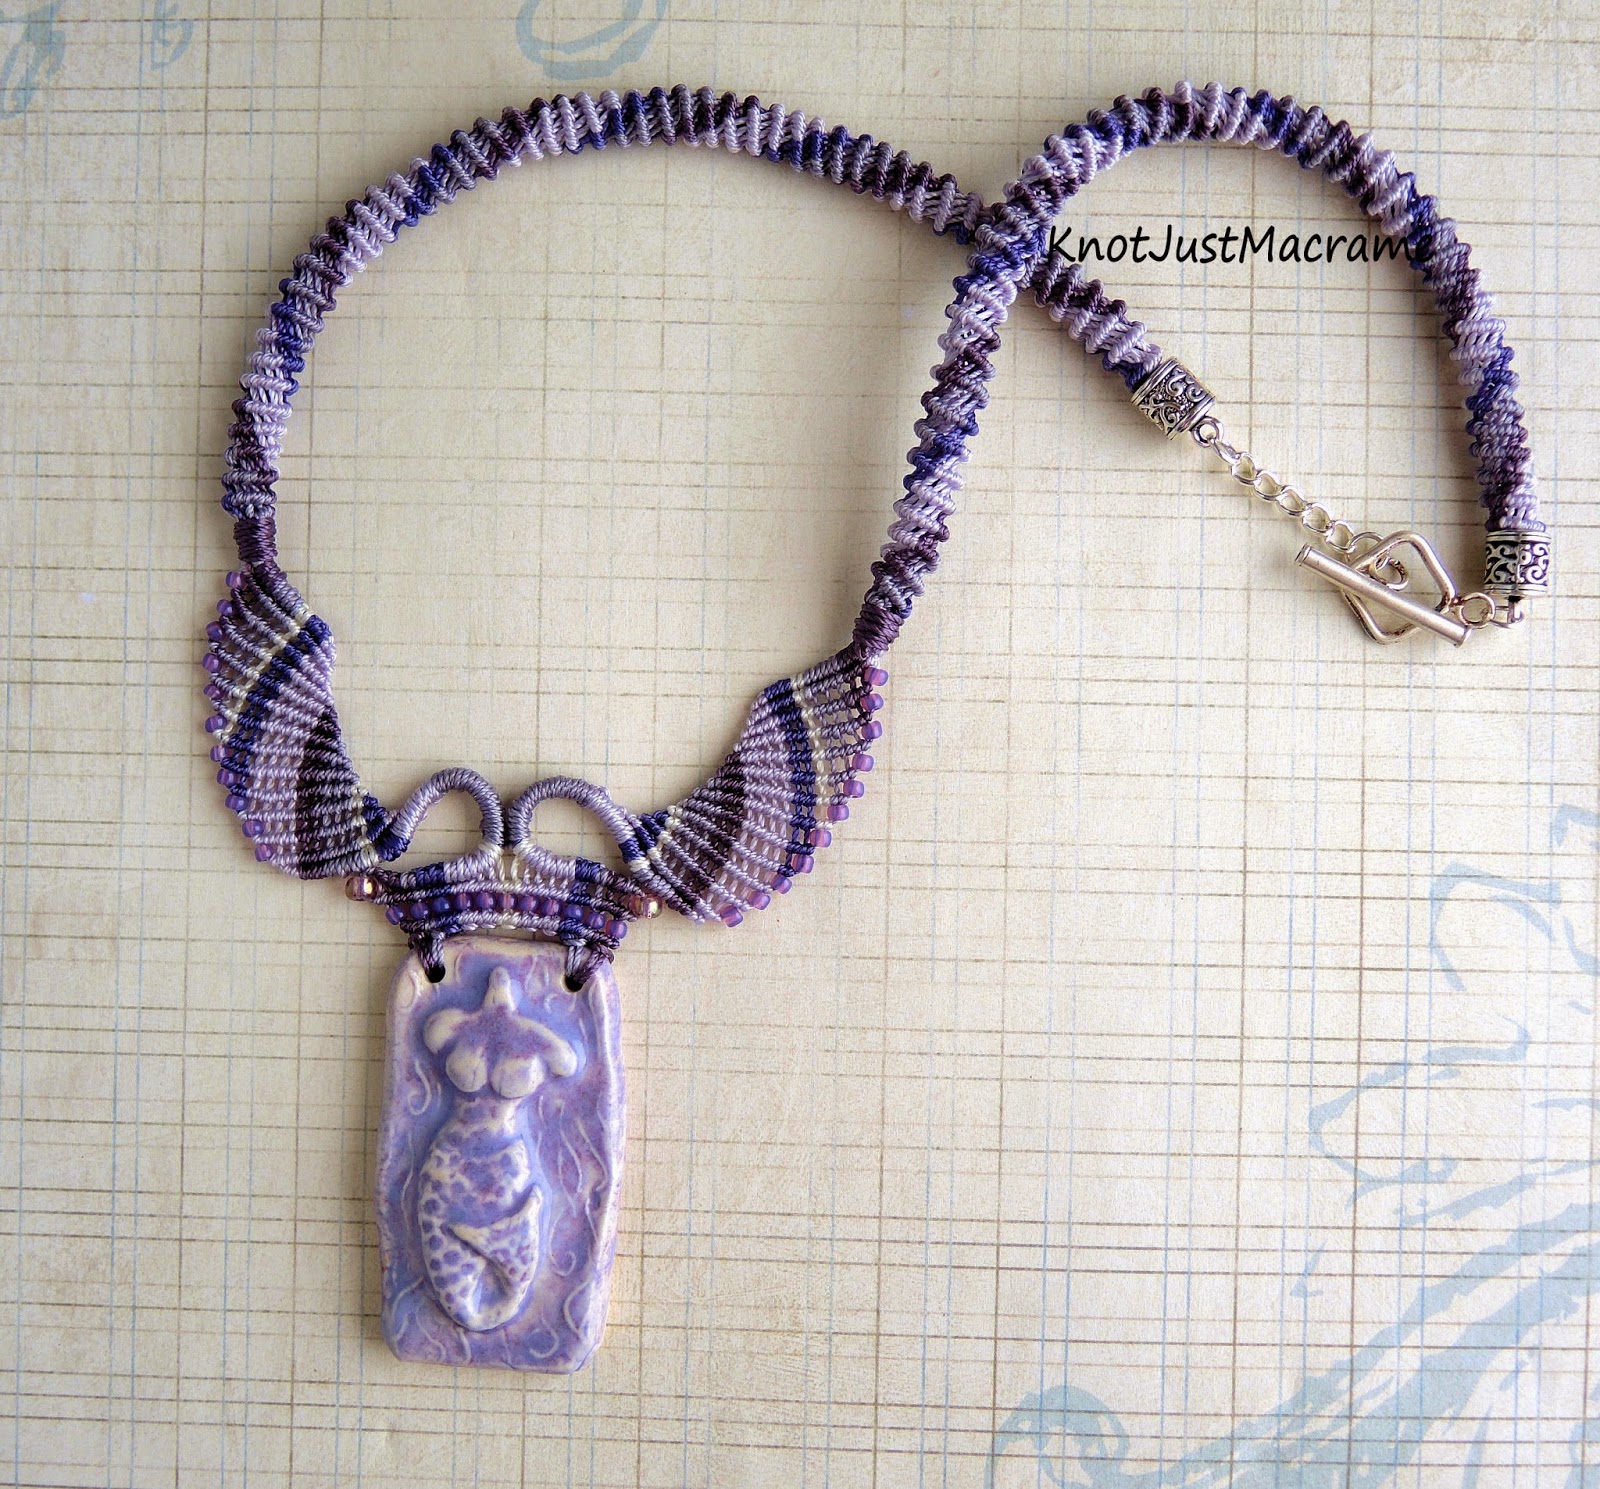
Isn't it beautiful!?!  I really wanted to use it in my piece this year and I think I just tried too hard.  I had an idea in my head and I just couldn't get it to translate into reality.  I spent hours on it and it just didn't do justice to that focal.  Lori did a blog post about the time I was struggling with it called Don't Be Afraid of the Do-Over, do I decided to take her advice.  I thought I would try my luck with the other focal Marianna sent, the ceramic mermaid pendant by Gaea, so I pulled out some cord and beads and came up with a palette.  


And this happened.


My mermaid goddess.  I'm really excited about this piece.  I messed with a few different design elements and I think the piece has flow and movement.


All the flow and all the movement brings the eye back to the star of the show, the mermaid pendant.

Want to see more?  You can check out my reveals for the 6th Bead Soup Blog Party and the 7th Bead Soup Blog Party or you can hop over to Lori's Bead Soup Blog Party page where she has the entire list (almost 500 participants!) of blogs to visit.  I don't know about you, but I plan on visiting every one of them.  It might take me a few days, but I'll get there!  Happy Hopping!

If At First You Don't Succeed

If you are looking for my Bead Soup Blog Party post, click here.  Otherwise, read on to see what's new with me.


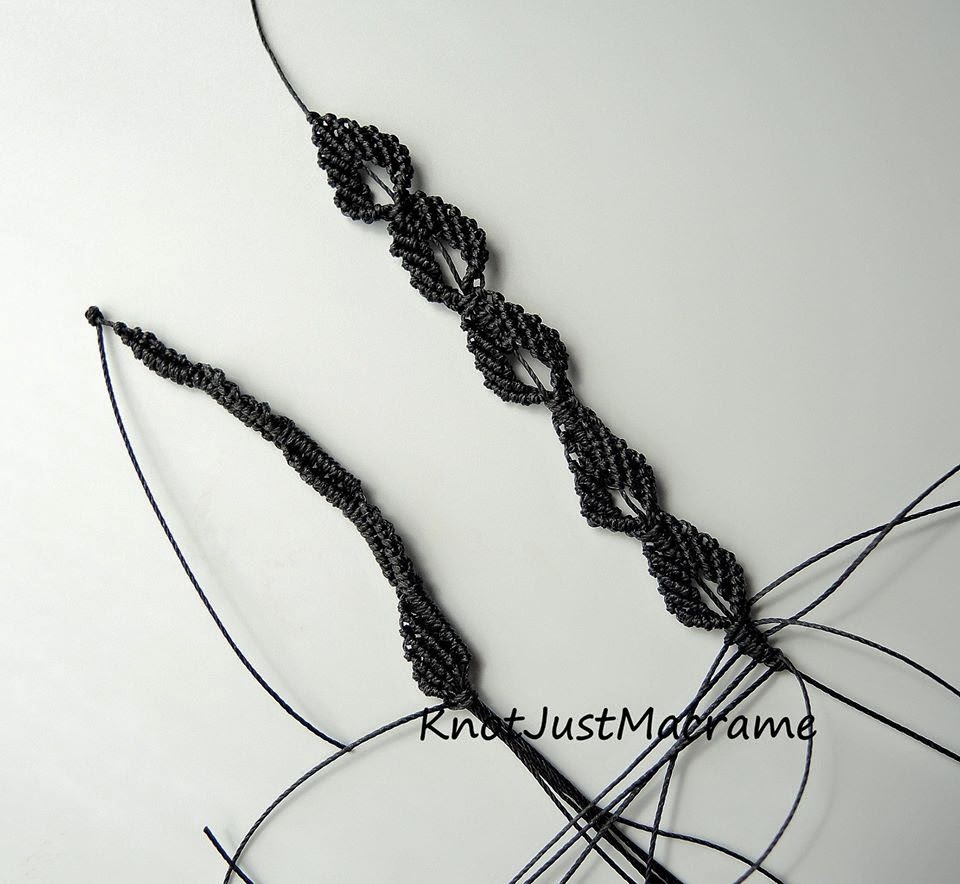
I've been messing around for some time now, trying to come up with a vine design.  My first attempts were not pretty.


Yes, I know, they weren't green, either, but that's beside the point.  I almost had something a couple of times.  I was so close, but it just wasn't right.  And there were more attempts I didn't stop to photograph.  The stench of failure was in the air.  But today, I took another stab at it:


It may not look like much, but after I picked out the good bits, I finally hit on a design I like!  And not only that, but I came up with a couple other ideas I will have to experiment with later.  For now, I'm going to revel.


I shall rejoice in my triumph and I shall vine.  It takes so little to make me happy!


Viewing all 283 articles
Browse latest View live