Quantcast
Channel: Knot Just Macrame by Sherri Stokey
Viewing all 283 articles
Browse latest View live

Beading Back in Time Reveal: Early Human Edition

$
0
0
Micro macrame necklace with raku pendant

It's that time, folks!  Today's the day we get to show you the pieces we've been working on for the second installment of the Beading Back in Time Blog Hop Challenge - the Early Human Edition.  I went into this planning to do something with a rustic, primitive feel to it.  I really wanted to make something inspired by the hand print paintings found in caves, like this:

Hand print cave paintings.

Something about them really speaks to me.  I think it's the connection with a real live, breathing human who placed his or her hand against the cool stone and blew pigment over it to leave these stencil prints so very long ago.

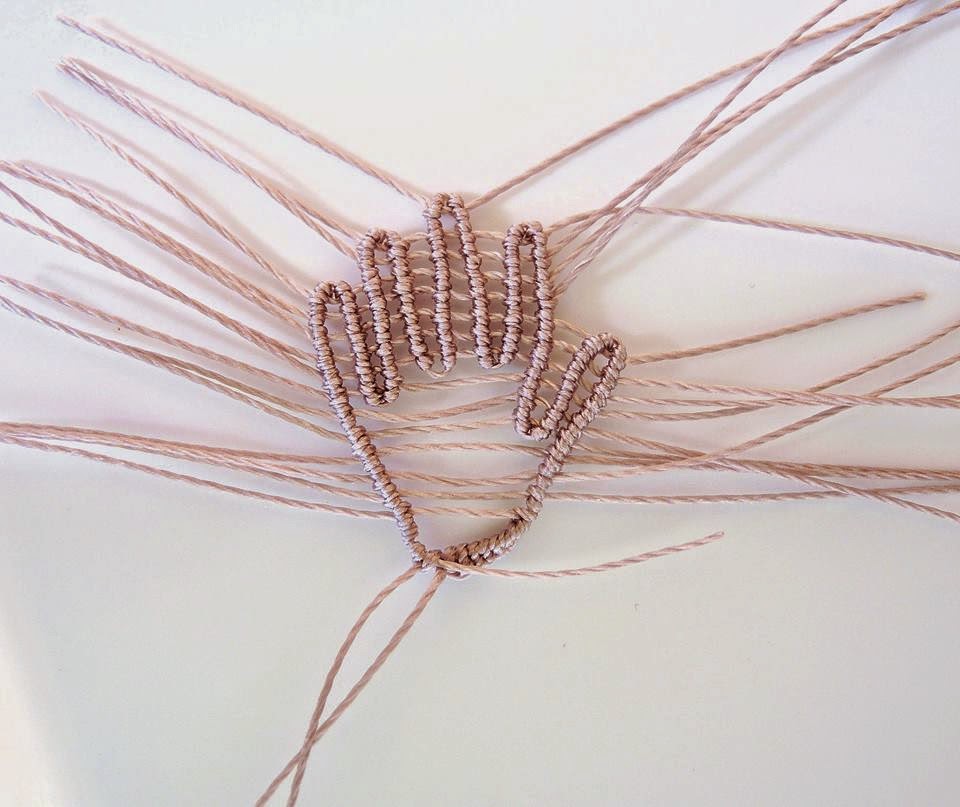
I wanted to knot hand outlines and then surround them with random free form macrame in a wide cuff, but when my first experiment with knotting a hand print turned out looking like an alien hand, I decided to rethink that strategy.

Macrame hand print.

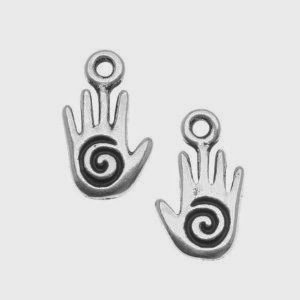
I still think there's potential for this concept, but it is going to take a lot more tweaking and I ran out of time.  (Making a mental note to come back to this at a later date.)  Then I thought I could adapt the idea a bit and make a sort of freeform necklace with handprint charms. I spent days researching until I found the perfect charms.  I liked these because they would hang right-side-up in my design and I thought the spiral had a sort of cave painting vibe.

Hand print charms.

And then that project didn't happen, either.  By this time I'm a week away from the reveal and I have nothing to show.  Luckily I had done some other shopping.  I had some components on the back burner and this piece from Star Spirit Studio really appealed to me.  It has the handprint and a horse drawing that would look good on any cave wall, and absolutely gorgeous colors, too.

Raku pendant by Star Spirit Studios.

So my piece is not really primitive and rustic.  It's for the refined cave woman with more discriminating tastes.  This cave woman isn't living in some nasty dark and dirty cave. Her cave is located on some nice lakefront property with a sweet view (and a cleaning lady who comes in twice a week).  While the others are out hunting and gathering, she's having a nice soak at the natural hot springs.  She might even find time between the hot stone massage and picking up her fur dresses at the cleaners for a mud facial.  Ladies and gentlemen, I present to you:  Caveman Chic

Micro macrame necklace knotted by Sherri Stokey of Knot Just Macrame.

Macrame necklace by Sherri Stokey of Knot Just Macrame.

That's it for me!  I hope you will take a minute and see what everyone else dreamed up:

Lindsay Starr, Phantasm Creations
Sherri Stokey, Knot Just Macrame <--You are here
Jenny Davies-Reazor
Jean A. Wells
 Stephanie Haussler, Pixybug Designs
Susan Kennedy, Sue Beads
Michelle McCarthy, Firefly Design Studio


Busy, Busy, Busy

$
0
0
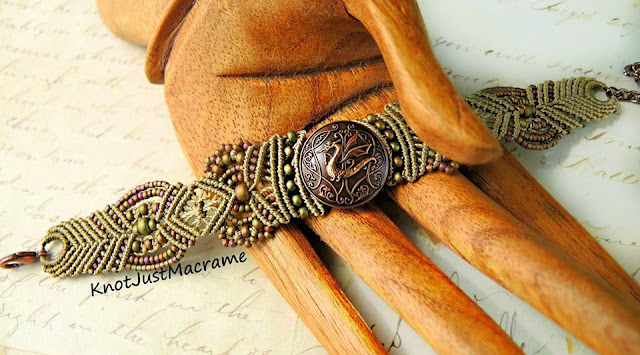
Micro macrame bracelet with dragon focal by Sherri Stokey.

So many ideas and so little time!  I swear the busier I am and the less time I have to knot, the more ideas I have.  I keep telling myself I need to write them down or sketch them out, because they will surely evaporate when I do find myself at loose ends.  

It's been busy times at my house lately with my son graduating from college (yeah, Nick!!!). 

Graduation

I even managed to snap a photo of my children getting along with one another.  Or appearing to in order to make their mother feel all warm and fuzzy.  Either way, I'll take it.
 
My kids!

We've been helping Nick get furniture and get settled into a little rental house in town and I'm SO excited to have him closer.  I will have to take some pictures and show you the crafty projects we've been working on like painting and distressing a coffee table, overhauling some old lamps and making wall art with scrapbook paper.

I have finished up a couple of macrame projects that were in the works, including these dragon bracelets in raku colors.

Beaded micro macrame bracelets in raku colors by Knot Just Macrame.

Then I made a matte metallic khaki iris version that's like my reset button.  The perfect combination of color and neutral.  My little spot of calm.  Ahhhhh.....

Close up of beaded macrame knotting.


A New Dragon

$
0
0
Dragon bracelet by Sherri Stokey of Knot Just Macrame

A customer asked me if I could make a dragon bracelet in the colors of sand and beach and surf and this is what I concocted.  I mixed a sandy tan in with some turquoise and deep marine blue (the sparkling crests of waves and the deep troughs of color), added some sky blue and a little touch of the white of a couple fluffy clouds.  Stirred them all together into a kaleidoscope of color and pattern, and came up with this:

Dragon bracelet in teal, turquise, blue and khaki by Knot Just Macrame

I am so drawn to these colors, I think I will take it a bit further and see what else pops.  Speaking of popping, which do you think works better in the photo:  a patterned background like the photo above or a plain one like below?

Dragon bracelet in teal, turquoise, blue and khaki by Sherri Stokey

The general consensus in some of the groups I belong to has been a plain, neutral background.  My eye is more drawn to the patterned photo, though.  Opinions?


My Dirty Little Secret

$
0
0
My family room a.k.a. my craft space.

At first glance, our "family room" looks like any other family room.  Not perfect, but not a huge mess.  I could have straightened out the pillows and folded up my blanket before I snapped the photo and it would be fine.  But underneath this calm exterior... I'm hiding a dirty little secret.  I have beading supplies stashed everywhere!  They're here under the TV:

Bead storage.

And here:

My end table.

And here:

My storage space a.k.a. furnace closet.

This is my craft storage.  It's really the furnace closet, but I needed somewhere to stash my stuff and the space wasn't being used for anything else.  It started off with just a big tub in there with my bags of beads all in together.  As my stash grew, it became a couple containers with little bags of beads sorted into bigger bags by color.  After I outgrew that system, my darling husband (who is a clean freak who probably wishes I shared even a little of that philosophy) built some shelves there on the left hand wall for me.

Beads and cord on shelves.

I sorted all the beads by color and I keep them in containers on my shelves.  As you can see, I've been switching over from the cheap and abundant ice cream buckets (dear husband is also an ice cream lover) to a slightly more sophisticated system of clear boxes.  My cord is on the sop there, also sorted by color and size.  Sort of.  And this is all fine and dandy until I drag some things out for a challenge and a few more things for a custom order and then a few more things for another project.  Pretty soon, every horizontal surface is covered with beads and cord and partially finished projects.

Every once in a while we are expecting company (or dear husband just can't handle the mess any more) and I have to clean off the surfaces.  That mostly means sweeping everything off into the nearest box - usually the one in which my newest acquisitions arrived.  Then the box gets shoved into the closet on the floor.  Eventually there are several layers of boxes.  Interspersed with photography props, macrame boards and random lengths of cord I've saved from other projects (I'm going to use those up for earrings.  Probably.  Some day.).

A mess.  A big, fat mess.

Before I know it, I have a great big mess.  I was looking back through some photos the other day and came across this one from three years ago.

Back in the day.

Just look how much neater everything was!  (We won't mention how much less stuff I had.)  I always have good intentions.  Really, I do.  Every once in a while I get really motivated and sort through all the boxes (usually when I can't find something I want) and put everything back in its place.  And I start all over.  Until then... it's a closet and I can shut the door and pretend it's not a pile just waiting to come tumbling out in a gloriously shiny, stringy mess.

A closed door. Nothing to see here.

So there you have it.  My dirty little secret:  I am a closet slob.  Literally.


Peacock Bracelet - A New Micro Macrame Tutorial

$
0
0

Micro Macrame Tutorial for Peacock Bracelet by Knot Just Macrame

A brand new micro macrame tutorial hit my Etsy shop today - a bracelet I'm calling Peacock.  I don't know if I'm always making "eye" motifs or if I just see eyes everywhere, but that's what I see in this bracelet.  Between that and the colors, Peacock seemed a good fit.  Skipping Stones was also in the running.  Doesn't it sort of look like this?

skipping stones

No matter what you want to call it, I'm calling it "finished"!  I always want to put out the best tutorial I can.  I want a person who isn't familiar with micro macrame to be able to be successful following on of my tuts, so I include lots of detail.  This one is 23 pages and includes over 60 photos.  I set the bar pretty high for myself, so when I get one to the point where I feel like it's ready for you guys to see, it's a big deal!  

Peacock micro macrame bracelet by Sherri Stokey of Knot Just Macrame.

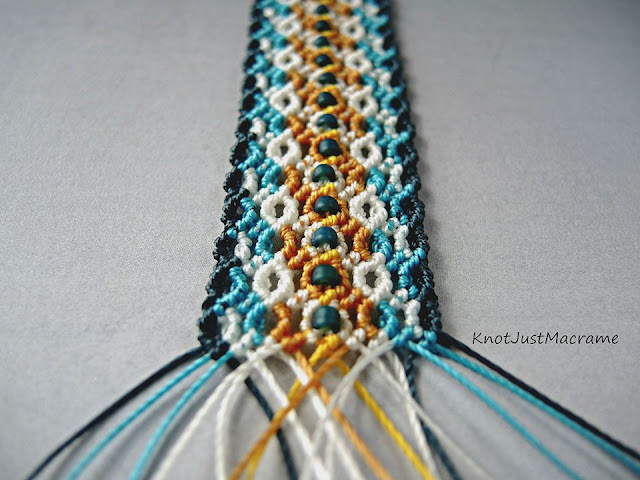
This pattern is fun and has loads of potential for color manipulation.  I used four different colors of cord and three colors of seed beads (and all the details are included in the tutorial - even the bead color numbers for this version).  I'm too lazy to do the math, but I do know that leaves you LOTS of color combinations to explore.

Peacock micro macrame bracelet in teal, olive and turquoise by Sherri Stokey.

I've got a couple of color ideas in mind, so I'm off to experiment.  If you decide to do the same, this link will take you to my Peacock Bracelet tutorial.  And be sure to stop by my Facebook page and show me what you made!


Daisies in Micro Macrame: A Color Challenge Reveal

$
0
0
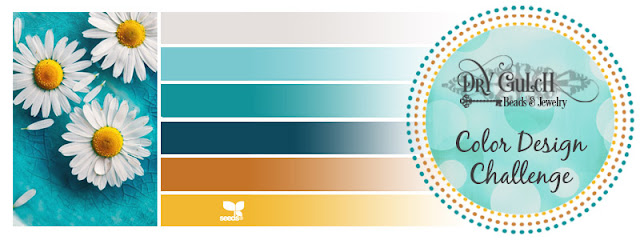
Dry Gulch Beads & Jewelry Color Design Challenge for May
 
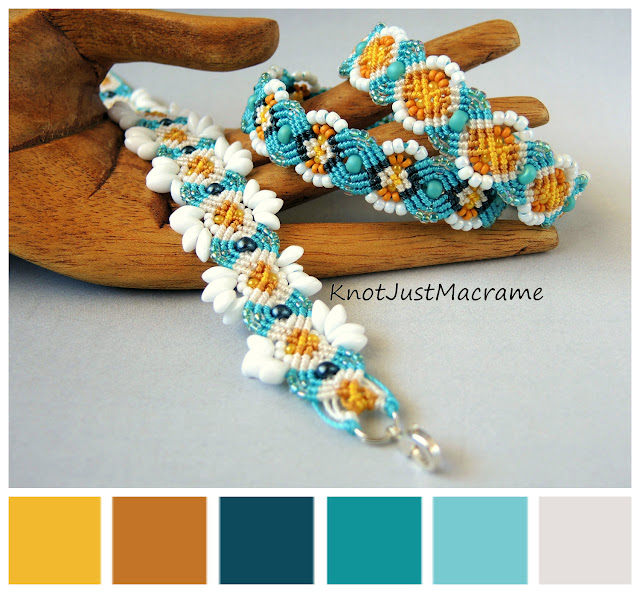
Dry Gulch Beads sponsors a monthly color challenge to inspire creativity.  As long as it is newly made specifically for the challenge, anything goes:  jewelry, clothing, paintings - even cupcakes!  This month's color palette (from Design Seeds) speaks to me.  I'm not sure if it is the daisies (love them) or the color palette (notice the teal and turquoise), but I adore it.

Beads and cord in the daisy color palette.

These are the beads and focal pieces from my stash that I thought might work.  (Can you name any of the artists?)  I just finished up a new micro macrame (microme!!) bracelet tutorial last week (Peacock) and I haven't had time to try out every color combination under the sun yet.  Heck, I haven't even tried all of the color combinations rattling around in my head for it yet.  So this color challenge seemed like as good a place as any to start.
 
Micro macrame bracelet by Sherri Stokey.

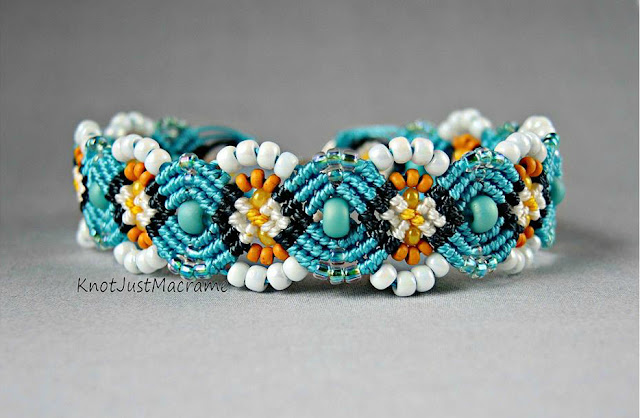
The first bracelet I made used all of colors from the palette - four colors of cord and coordinating glass seed beads.  I really wasn't sure what look I would get with the different colors and the contrast between them, so I just sort of put the colors in an order I liked and took off from there.  Color placement in macrame is a little different than stringing or bead weaving, etc.  The cord colors meander through the design in a pattern determined by the knots.  I have had enough practice now that I can make the colors do what I want a little bit, but it's still not an exact science.  The cords will go where the cords want to go (that's my story, anyway).  
 
When creating a piece like this, it's always an adventure for me (yes, I'm really that weird).  Once I had the knotting underway, I noticed an actual daisy shape emerging.  I hadn't really intended to do a literal daisy pattern; I'd just planned on using the color palette.  But heck, since I was this close, might as well push it.  I went back to the drawing board and took another run at it.

Micro macrame bracelet by Sherri Stokey of Knot Just Macrame.

In this piece, the round daisy shape is more complete, but this time my petal to daisy center ratio is off.  I told you it was a bit of trial and error!  Third time's a charm, though.  Right?  I figured I needed to fix the ratio and then I had a brilliant thought about "petals".  I replaced the outer row of beads with Magatamas and got this:

Daisy micro macrame bracelet from Knot Just Macrame.

Huh.  Interesting!  So there you have it:  my three daisy palette bracelets.  I think I'm still partial to the first one - something about the color placement in that one appeals to me.  The third one probably most closely captures the photo and the color palette.  It's hard to choose.  They're all my babies :)  And they're all perfect for summer!

Three micro macrame bracelets in daisy color palette.

Dry Gulch Beads has a page set up for all of the challenge pieces here.  I'm off to see how this palette inspired others!


I'm Still Here!

$
0
0
Beach theme free form micro macrame doodle necklace by Sherri Stokey

It's not that I've forgotten you, I promise.  It's been quiet around here because I've been busy clearing up a few projects and orders.  I finished the little free form macrame doodle above for a customer who likes to hang her glasses on her necklace (isn't that a clever idea?).

Hydrangeas micro macrame bracelets from Knot Just Macrame.

I also finished up an order for a customer who is going to surprise each of her sisters with a micro macrame bracelet at their upcoming family reunion and made one more bracelet in the daisy color palette (you can find the color palette and other pieces in this post).

Marquis micro macrame cuff in daisy color palette.

I finally put together a few kits for my Etsy shop and I'm "auditioning" some new backgrounds for my photographs.  All good stuff, just not really all that exciting for a blog post.  I'm still here, though.  I haven't forgotten you, I promise!  I'll be back soon with the finalists for the new backgrounds - you can help me choose :)
 

Serenity

$
0
0
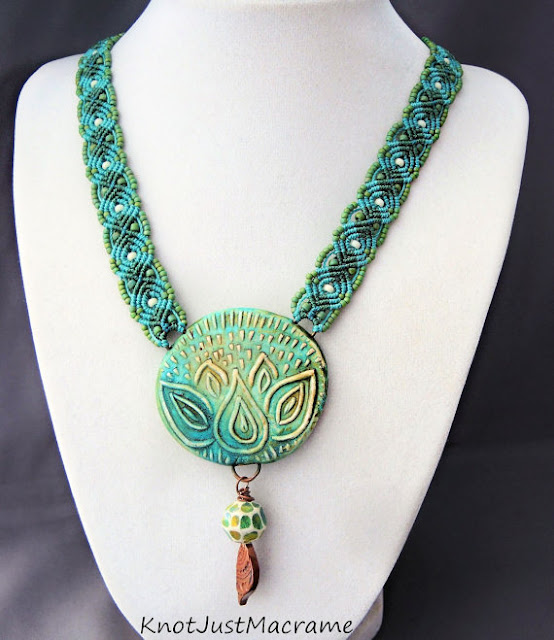
Macrame necklace with art beads.

I'm a compulsive buyer, I'll admit it.  I see something beautiful and it's not enough to admire it; I want to possess it.  I want to be able to touch it and feel the texture and admire the colors close up.  This polymer clay lotus pendant from Staci Louise Originals was one of those pieces I had to own.  I was powerless to resist.  I'm always a sucker for a lotus motif and the shading she did on this one... ooooohhhhh, the color!

Micro macrame necklace strap by Sherri Stokey of Knot Just Macrame.
 
For the macrame strap on this one I used a slight variation of my new Peacock Bracelet Tutorial (I just switched up the beads a bit and started with longer cords.)  I also used some of the new semi-glazed seed beads from Toho:

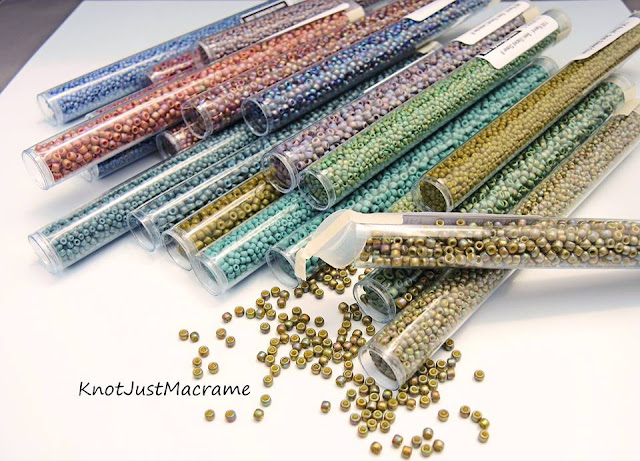
Semi glazed toho seed beads.

The colors of these beads are really soft with a little color variation to them, which plays well with Staci's pendant.  To finish off the pendant, I added a faceted polymer clay bead from Barbara Bechtel and a copper leaf headpin from Kristi Bowman Design.  I think the combination is something pretty special (then again, I may be slightly biased).

 Lotus necklace by Sherri Stokey.
Micro macrame lotus necklace from Knot Just Macrame.


Another Variation and A Contest!

$
0
0
Micro macrame by Sherri Stokey of Knot Just Macrame.

You know how much I love to play around with variations on a theme, whether it's changing a cord color, changing out beads, or modifying a pattern.  I just finished up this pretty bracelet in soft seaside colors and it's just a slight variation of my Leaves Micro Macrame Bracelet pattern.   
 
Micro macrame Leaves Pattern by Sherri Stokey of Knot Just Macrame.

I started out trying every possible color in a solid colorway in this pattern and then I needed more.   I always feel like I need to take it just a little bit further and I'm fascinated with multiple cord colors.  I never know exactly where the colors will end up until I've tested it out, so it's like opening a little gift every time.  For this new bracelet, I twisted together two different colors of cord and hid that in the center row of beads to get a different color on each end of the piece.  Clever, huh?  I also switched up the rows of beads in the center of the bracelet.
 
Micro macrame bracelet by Sherri Stokey of Knot Just Macrame.

I've experimented with shading and ombre:

Micro macrame bracelets with color shading by Knot Just Macrame.


I tried a duplex color mix on opposite sides of the bracelet instead of opposite ends:

Duplex color micro macrame bracelet.

Tuxedo color micro macrame bracelet.

You are really only limited by your imagination, even if you're working with the same basic pattern. Ms. Nadja Shields of Imbali Crafts has the same fascination with variations.  She recently worked with my Hydrangeas pattern and did a little tweaking of her own.  She changed up the closure with a loop and button and also added another row of knotting between the sections:

Hydrangeas micro macrame bracelet variation by Nadja Shields of Imbali Crafts.

Isn't that lovely?  She had such fun with it, she is sponsoring a little competition.  The challenge is to take the Hydrangeas pattern and add your own twist.   You could add beads where there aren't any or add knots instead of beads.  Maybe you could add a tie closure a sliding one.  Whatever variation you can dream up.  When you've finished it up, head over to this page to enter your creation.  You have until July 20, 2015, when she will be announcing the winner.  And the best part?  You can win any four of Nadja's micro macrame tutorials - you get to choose!

Macrame contest challenge.

Are you still here?  I thought you'd be busy working on your entry by now!  :)


Beading Back in Time - Early Civilization Blog Hop Challenge

$
0
0
Beading Back in Time Dawn of Civilization Blog Hop

Do you remember way back in January when I first told you about a series of blog hops my friend Lindsay Starr and I were going to host?  No?  Not to worry (my memory isn't always so great either) - you can always follow this link to the original post and refresh your memory.  We started with the Pre-Human Edition and then moved on to the Early Human Edition.  For the third round, we'll be taking our inspiration from the early civilizations.  And boy, is there a lot to choose from!

Sumerian writing - account of silver for the governor (public domain)

The first written language appeared near the beginning of this period. It's generally agreed that the ancient Sumerians invented it about 3200 BC and the picture above is an example of Sumerian text.  These guys weren't just sitting around admiring their penmanship, either.  They were doing things like inventing the wheel and plow; making advances in arithmetic and geometry; and studying astronomy, chemistry and medicine. 

The Sphyinx and the Pyramid of Cheops in Egypt (public domain)

The folks in Egypt were keepin' up with the Jones', too.  They'd built the Great Pyramid at Giza and the Sphinx before the mammoths even went extinct!

Wooly mammoths (public domain)

Just think about that for a minute.  That's a long time ago and those structures are still standing.  If that's not truly awe inspiring, I don't know what is.  They were also inventing a calendar with 365 days and 12 months, a system of written numbers and a form of geometry, and practicing medicine.

Indus Valley seals (public domain)

The Indus Valley Civilization was another of the big ones, and the most wide spread in the Old World at the time.  Their engineers created plumbing and sewage systems and they built houses of brick with bathrooms!  And flush toilets!

Prologue to the Hammurabi Code at the Louvre (public domain)

Over in ancient Babylon, King Hammurabi came up with the oldest existing code of laws.  This guy put 282 laws covering all aspects of life in writing.  His goal was for government to take responsibility for order and justice, and if you think about it, that's a big deal for any civilization.

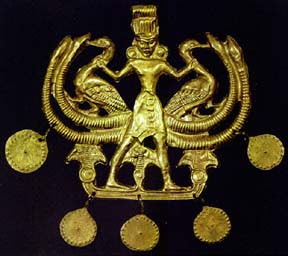
Minoan Master of Animals (public domain)

The arts were flourishing in these civilizations as well, with some breathtaking jewelry in the mix like the Minoan Master of Animals shown above or the Egyptian pendant below:

Egyptian pendant (public domain)

How's that for a bunch of inspiration?  Our challenge is to create something inspired by this theme:  the Dawn of Civilization.  Use any medium you like and draw inspiration however you like, whether it's a certain civilization, a style, or even a specific material (got any gold laying around?).  Then meet Lindsay and I back here on August 1st to see what everyone made.
And most of all, remember to have fun with it!

A Quick Update

$
0
0
Micro macrame class with Sherri Stokey
 
Just look at the concentration on those faces!  I did a workshop in Colorado Springs this past weekend and the students were awesome.  Peg, the lady who got me started doing online classes for CraftArtEdu, is the one who set up the class and I was really excited to get to meet her in person (that's her in the bottom right photo, far right).  Another online friend, Shane (next to Peg in the photo), was also there - you might remember these beads she made for me:

Polymer clay beads by Shane Smith

It was the first time Shane and I got to actually meet, too.  And then the fabulous Donna Kato dropped by the class to say "hi"!

Sherri Stokey and Donna Kato

I have to admit, I was a little starstruck.  She's a big deal!  This woman is a dynamo - a world class teacher, author, polymer clay guru and co-founder of CraftArtEdu.  Busy lady!  

While I was gadding around Colorado Springs (I did find time to do some shopping, try some fun restaurants and hit the Renaissance Festival), I missed the release of Nadja Shield's new class!

Barefoot Sandals class by Nadja Shields at CraftArtEdu

Aren't those fun!?  Anyone who's known me for five minutes knows I hate wearing shoes.  One of the guys at work called me the Imelda Marcos of sandals (insert blushing emoticon here).  It stands to reason, then, that I would LOVE Nadja's new project - Barefoot Sandals!  The class is here, if you're interested, and if you hurry, you can get 30% off on ANY of the online micro macrame classes at CraftArtEdu (good through midnight CT, July 14, 2015, no coupon necessary).

Summer is just flying by for me but I'm loving every minute of it.  I hope you are getting a chance to enjoy it, too!

How to Finish a Macrame Piece with a Ring: A Free Tutorial

$
0
0
Micro macrame closure with knotting around a ring.

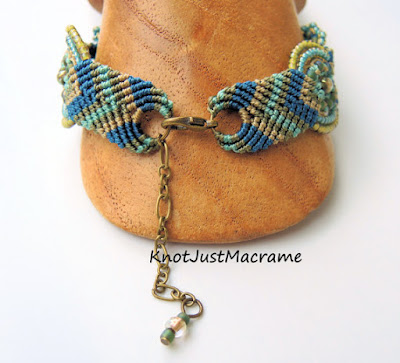
One question I hear quite a bit is about how I finish off many of my micro macrame pieces.  I often use a split ring and clasp method.  I like finished look it gives my macrame bracelets, the security the lobster clasps provide and the fact that I can make a piece adjustable by adding an extender chain.  I've covered how to do this technique in many of my classes and tutorials, but I thought I'd put it here for easier reference or for folks who are only looking for this tidbit of information.  

Reverse side of macrame bracele

This method works best if your macrame design ends with a "v" shape for the ring to nestle down into.  I use split rings rather than jump rings for the security (the small cords I use have a tendency to escape jump rings, no matter how tightly I think I have them closed).  Closed or soldered rings will work as well.  I add the clasp to my split ring before knotting.  Start by turning the piece over.  We'll be knotting this part from the reverse side and attaching each of the cords to the split ring using a larks head knot.

Making a larks head knot around a split ring.

Tying a larks head knot around a ring is the same as tying one around a cord.  Make the first half of the knot by bringing the cord through the top of the ring and back through the cord loop.  Tighten the first half and then complete the second half of the same knot by bringing the cord up through the back of the ring and through the cord loop.  I tie the cords starting from the center and working out to one side, then back to the center and out to the other side to help keep the ring centered in the bracelet.  If you flip your piece over at the half way mark, it should look like this:

Front side at half way point.

When you've attached all of the cords, the back should look like this:

Reverse side after all cords are attached to ring.

When you flip it back to the front side then, it should look like this:

Front side of macrame after attaching all cords.

If you get stuck, just remember that you are making a larks head knot, just substituting a split ring for the holding cord you would normally be using.  This video might help, too:


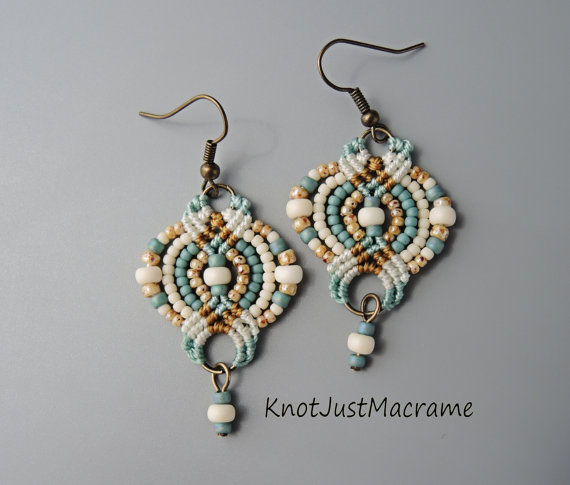
This technique is useful for finishing all sorts of micro macrame pieces, not just bracelets.  I use it on earrings, too:

Micro macrame earrings by Sherri Stokey of Knot Just Macrame.

Hopefully this tutorial will help somebody somewhere down the line.  My little way of paying it forward.  If you like what you see here and you'd like to learn more, check out my micro macrame tutorials on Etsy or one of the many online macrame classes I offer at CraftArtEdu.  Happy knotting!!


Frooster the Fruit Rooster

$
0
0
Frooster the fruit rooster.

One of my favorite things to do on a Saturday morning is to go treasure hunting at garage sales with my cousin, Amy.  You just never know what you're going to find, and nothing demonstrates that better than a fruit rooster.  Yes, my friends, I found this little gem hidden amid some mismatched glassware and a Hello Kitty lunchbox.  My daughter just rolled her eyes and called me a child when I showed it to her, but seriously, how can you not be fascinated with this thing?  Think about it - how to you suppose the conversation went when someone was thinking it up:
CEO:  What pieces do you think we should add to the ceramic figurine line this season?  I'm thinking the smiling strawberries and the dancing mouse in a lace cap did pretty well last year.
IDEA DUDE:  How about a chicken with a body made out of fruit.  We'll do a bunch of grapes for the main body piece, dangling strawberries for the legs and a bunch of bananas all fanned out for the tail.  Oh, oh, oh - I know!  We'll add a couple ears of corn at the bottom and tuck in a few random feathers.  Maybe bright blue feathers!  Then we'll stick on a realistic chicken head and feet and it'll be great!
CEO:  You know bananas don't actually grow that way, right?  They grow in nice neat bunches, not all willy nilly like that.
IDEA DUDE:  Really?  I'm building a fruit rooster here and you're worried about realistic banana growth patterns?
Frooster the fruit rooster on the stairs.

I got really bored later and decided to do a little photo shoot with Frooster (what?  What else would you name a fruit rooster?).  Doggie was pretty curious:

Frooster the fruit rooster meeting Doggie.

 But Frooster's engaging personality won her over:

Frooster the fruit rooster riding Doggie.

We broke for lunch, but Frooster was disturbed by my husband's choice:

Frooster the fruit rooster considering KFC.

So we moved on to some glamour shots.

Frooster the fruit rooster striking a sexy pose.

 My family plays the White Elephant gift game (maybe you call it Dirty Santa?) at Christmas.  We usually set the limit at five bucks and then have a pretty good time stealing gifts and fighting over things like giant jars of pickles or a bottle opener key chain.  I'm thinking this is going to be the best gift ever!  I can picture it now - Frooster returning to our game year after year and everybody picking the smallest gifts first because they know those couldn't be him.  Yes, my new pal, Frooster, and I are going to have a lot of fun together.

Frooster the fruit rooster with a twinkle in his eye.


Beading Back in Time, Early Civilization Reveal

$
0
0
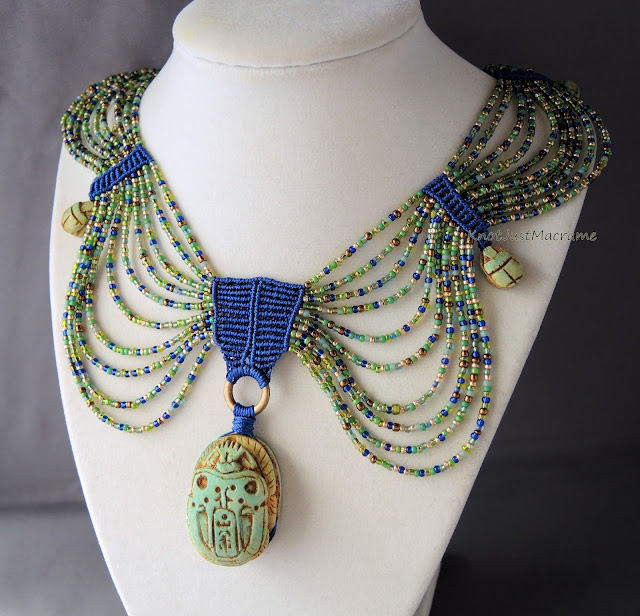
Egyptian style collar with Scarab by Sherri Stokey of Knot Just Macrame.

It's time for the big reveal!  Earlier this month I posted about the third installment of the Beading Back in Time Blog Hop Challenge hosted by Lindsay Starr and I (it's here if you missed it).  Our first installment in January focused on the time before humans and the second installment, on early humans.  For this round, we drew inspiration from early civilizations.  I really meant to explore something other than ancient Egypt, but I've been an Egyptophile since I was a kid and the temptation was just too strong.

Micro macrame bracelet in Egyptian colors by Sherri Stokey.

 I have a seed bead mix called Egyptian Lapis Stripe.  I dug it out and put it with some bright blue cord to start channeling some Egyptian vibes.  It's pretty enough, but it really wasn't screaming "Egypt" to me, so I figured I'd better try a little harder.  The first thing that comes to mind when I think of ancient Egyptian jewelry is a collar.  And gold.  I don't use a lot of gold, but I knew I wanted to add it in my piece somehow.  I was also pretty set on the bright blue cord.

Ends of macrame necklace featuring ceramic pieces from Scorched Earth.

When I was digging through my stash looking for stuff with Egyptian flair, I came across some end pieces by Scorched Earth.  They're not exactly Egyptian, but I liked the feel of them.  I also had an Eye of Horus pendant from Scorched Earth and a bunch of scarabs.

Eye of Horus focal by Scorched Earth, various scarabs.

The bead mix I had didn't quite match the end pieces (not enough green, too much orange), so I mixed my own.  I also unearthed these gold pendants from a swap I did a while back with my friend, Lennis (she put together an awesome Egyptian inspired package for me you can see here). 

Custom seed bead mix, gold pendants with Egyptian theme.

By this time, even though I'd had a whole month to make a piece for this hop, I'd wasted 91% of the allotted time.  Typical.  Apparently I work best under pressure.  I hadn't counted on breaking a crown and having to have a tooth pulled, however.  Note to self:  start earlier!  I did manage to pull off a piece just in the nick of time, though.

Egyptian style collar in macrame by Sherri Stokey of Knot Just Macrame.

My Egyptian inspired collar, featuring Egyptian blue cord and a custom bead mix, several small scarabs and one larger focal scarab.  It's a super cool scarab, too.  I have no idea what the back says, but it's fun.  My original plan was to use the Eye of Horus focal and my backup plan was to use one of the rectangular gold pieces.  The shape of those just didn't work in the piece as well as the rounded shape of the scarab.

Engraving on back of scarab.

I can picture this piece being worn by some Egyptian back in the day, can't you?

Egyptian style collar in micro macrame by Sherri Stokey.

I hope you'll join me in visiting the sites of the other artists who decided to play along this round:

Sherri Stokey  <--- You are here 
Lindsay Starr  Co-Host
Susan Kennedy
Jean Wells
Michelle McCarthy
Niky Sayers
Jenny Davies-Reazor
Stephanie Haussler

Beading Back in Time Blog Hop Challenge:  Early Civilization


Drunkard's Path: A New Micro Macrame Class

$
0
0
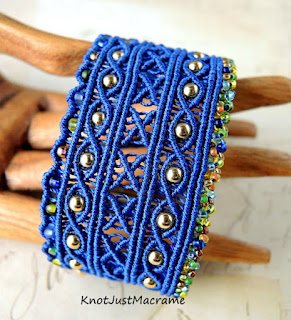
Drunkard's Path micro macrame bracelets by Sherri Stokey of Knot Just Macrame.

A new micro macrame class hit the streets yesterday, for my Drunkard's Path Bracelet!  I've seen lots of variations of the waves done in macrame, but I wanted to put my own spin on things.  I added some extra knotting to beef up the knotted portion and give the macrame more equal billing with the beads.  It's only fair.

Drunkard's Path micro macrame bracelet by Sherri Stokey.

I was searching for a name for this project when about the swaying lines made me think of a crooked path.  My mom is an avid quilter (you can see several examples of her work on my blog here, and here, and here, and quite a few more in an album here) and that brought to mind the Drunkard's Path pattern.  It seemed to fit.

Drunkard's Path micro macrame bracelet from Knot Just Macrame.

I really tried to break this project down into tiny steps so anyone can do it.  I demonstrate all the knots and there are loads of photos.  There are actually 9 video clips and over 70 pictures in the class, in addition to the written direction and the narration!  

Micro macrame class at CraftArtEdu - Drunkard's Path by Sherri Stokey.

In this class, I'll show you how to get started and give you some tips to make everything go more smoothly.  I'll show you how to tie all of the knots, step by step.  And I'll show you how to finish your bracelet with a split ring and clasp to get a professional look!  Don't forget, CraftArtEdu gives you unlimited access to the classes you purchase; you can view them as many times as you like and your access never expires.

Micro macrame bracelet class at CraftArtEdu - Drunkard's Path by Sherri Stokey.

The class is on sale through Sunday (August 9, 2015).  In fact, because the folks at CraftArtEdu love a good sale, all of my micro macrame classes are on sale through Sunday!  No codes needed and you can see the whole list here.  Happy knotting!!!

Micro macrame bracelet class:  Drunkard's Path by Sherri Stokey.

Oh, and if you're just not interested in making one yourself, but you really, really think you need one?  These are available in my Etsy shop.  


A Micro Macrame Primer and Upcoming KnotAlong!

$
0
0
Note:  I'm really excited about this project and I want to get the word out to as many people as possible.  This post is running at Love My Art Jewelry as well, so if you follow both blogs, I apologize for the duplication.

Micro macrame cuff by Sherri Stokey

Do you ever see a beautiful piece of handmade jewelry and get depressed?  Not because there's anything depressing about the piece, but because you think you'll never be "good" enough to make something that lovely?  Well, stop that!  This is a no-whining zone and self pity is counterproductive.  
Don't get me wrong, I've been there.  It's an easy trap to fall into, but basically you have two choices:  you can either admire the piece for its artistry and purchase it from the person who has probably spent countless hours creating it (and possibly several years learning before that) or you can take a stab at it yourself.  
 
I'm curious and I'm from a background where I want to try doing everything.  I wallpapered most every room in my house back in the 80s, learned how to give home permanents, make candles and can tomatoes just "because".  As you can probably guess, not all were wise decisions.

 DIY gone wrong.

  (She's still mad at me about that one, by the way.)  Luckily, I'm now at an age where I know my limitations and instead of taking that as a personal failing, I'm getting better at appreciating the talent of others.  Even if I could make a polymer clay lotus pendant like the one from Staci Louise that I used in this necklace, I would probably never get the feeling she has in her piece. And that's okay - it means Staci is doing something right!

Micro macrame necklace with Staci Louise Pendant.

If you decide you do want to try something for yourself, find a good tutorial or class and then go into it with the right mindset.  Learn for the joy of learning and you will leave with a greater appreciation of the artist's process, even if you never use the technique again.  And if you do discover something new that you love, that's even better!

So, for those of you who've made it this far in the post (and hopefully the others are over shopping in my Etsy store), I'm going to give you a micro macrame primer.   I'm going to cover the tools and materials you will need to get started with micro macrame, then I'm going to give you a couple weeks to round up your "stuff".  While you're doing that, I'll be busy writing up/recording a special beginner project for us:  the world's very first KnotAlong!   I'm going to meet you back here  in two weeks (on August 21st) for your first "class".

Are you ready, kids?  I can't hear you! :)


 If you want to play along with my KnotAlong (and why wouldn't you?), you have two weeks to gather up these things.  I've added some suggestions for sources* to get you started.
  • Pinning surface:  You can use cork or anything that will hold a pin.  If you want to purchase a foam board, here are some sources:   Amazon, Art Beads, Etsy, Walmart, Fusion Beads
  • Fray Check:  Fire MountainAmazonWalmart, my local Walmart carries this in the sewing aisle as do most fabric stores.
  • GS Hypo Cement:  Fire Mountain, Amazon, Walmart, Art Beads
  • Tex 400 nylon bead cord (I recommend C-lon or Superlon brand):  Bello Modo, South Pass Beads (they have Hypo Cement, too), Shipwreck Beads, Jewels in Fiber.  You will only need about 6 yards for our project, so you will have lots left on your spool for your next project.  Don't get hung up on the cord, either.  If you have some 1mm hemp on hand, it will work.  I don't recommend Rattail or other "slippery" cord.
  • Pins - straight sewing pins and/or T-pins:  can be found in fabric stores, the sewing aisle at Walmart, Michaels, Hobby Lobby
  • Scissors
  • Something to straighten cord (hair straightener, curling iron, regular iron, etc.)
  • Approximately 60 8/0 seed beads. Inexpensive craft store beads will work fine for this project.

You won't find a better time to jump into micro macrame than this.  Here's a peek at what we're going to make:

Beginner micro macrame project by Sherri Stokey

I might even sweeten the pot a little.  I'm thinking maybe a giveaway for those who participate...  So?  Who's with me?


*Sources listed are US suppliers.  Some others to try:  UK - Knotting Ways
Australia - Benjamin's CraftsOver the Rainbow, France - Perles & Co. 

I'm Not Normal

$
0
0
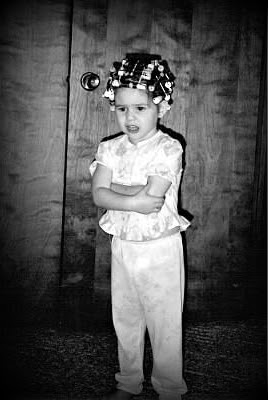
Me as a strange toddler.

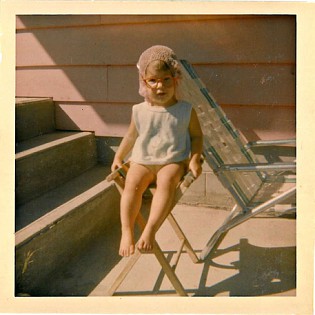
I accepted the fact long ago that I am not normal, not quite like everyone else, and I'm cool with it.  Yes, that's me in the photo and my mother swears she has no idea what was going on there.  I suspect this was just one of the early signs of my un-normalcy.

This time of year as the days are getting shorter and people are thinking of football and harvests and autumn colors, I'm still in summer mode.  I have to be drug into fall kicking and screaming.  I don't know if it's my reluctance to let go of summer or just "me", but my take on autumn colors is even different than most people's.

Micro macrame by Sherri Stokey.

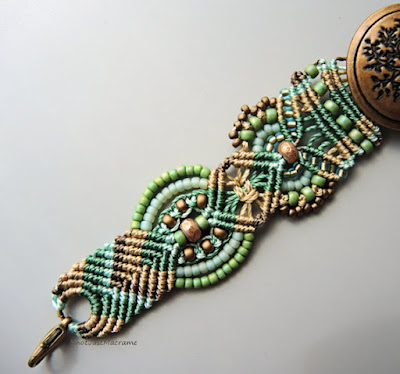
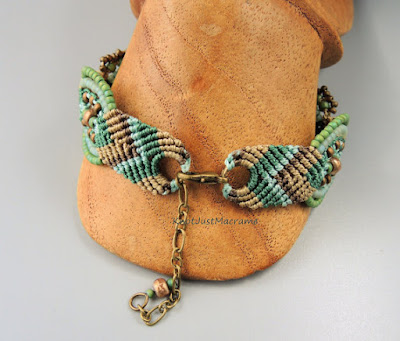
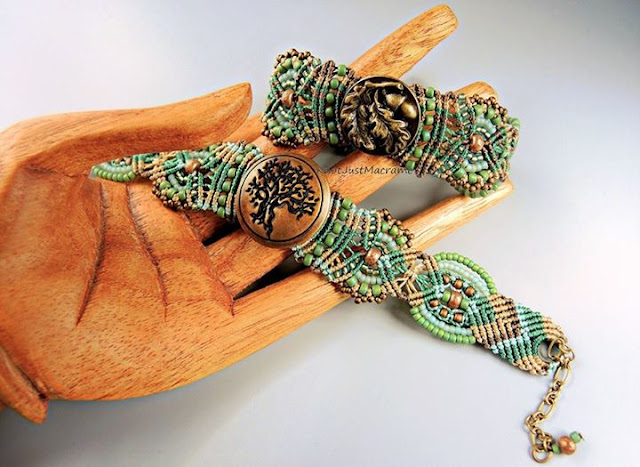
I've been making some pieces that seem autumnal (in my mind) with tree themed focals and greens with browns.  I found a brass tree of life button at a Renaissance Festival in Colorado this summer.  I think it looks pretty nice in a band with a combination of khaki and brown with some myrtle green and turquoise. The back really shows off the colors.

Back of micro macrame bracelet from Knot Just Macrame.

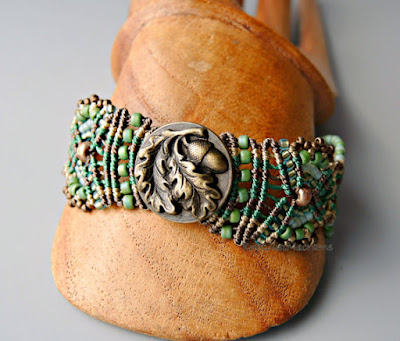
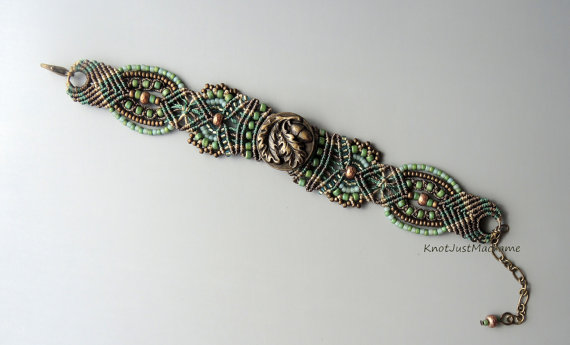
Oak leaves and an acorn are front and center on the next button.  I went a little more traditional on this one, keeping with the myrtle green (it's a sort of blue tinged green) but dropping the turquoise cord.

Oak leaves and acorn button in micro macrame.

The overall piece is a little darker without the lighter turquoise and I sort of like that.

Oak leaves and acorn button in micro macrame bracelet.

It "feels" kind of warm and cozy to me, like a snuggly sweater on a brisk evening.  

Micro macrame bracelets by Sherri Stokey of Knot Just Macrame.

I might even be convinced to like fall if it didn't mean summer was over.  I've been known to wear sandals into November, trying desperately to hang on to the very last shred of summer.  And to go back to the not normal thing?  I've also been known to do this more than once.  *sigh*

Wearing mismatched sandals.


Hold the Boats, I'm Not as Crazy as I Thought

$
0
0

Don't get me wrong, I'm still not as normal as some folks, but it turns out I'm not completely off my rocker when it comes to autumn colors.  Remember when I showed you these pieces and said I thought of them as autumn colors?


I've come up with a theory on that.  I went to Valentine (my hometown) this past weekend and spent some time out and about naturing.  Apparently the colors made more of an impression that I realized.  Look what palette you get if you run that soapweed photo through a palette generator:


Mystery solved!  I'm not as nuts as I thought I was.  Well, okay, the mismatched sandals and the snood thing are definitely headed in that direction, but I'm sticking by my color choices on this one.  I think I'll call it August in the Sandhills.


It's a really beautiful area (I've posted photos several times before, but some favorites are here and here).  I'll leave you with this little glimpse of heaven.


Learn Micro Macrame with Me - For Free!

$
0
0
Micro macrame supplies.

In case you haven't heard, I'm hosting the world's first KnotAlong starting this Friday, August 21, 2015.  I'm going to be demonstrating how to make several macrame knots that I use in my jewelry pieces, including Larks Head, Double Half Hitch and Square Knots.  In the process of learning those knots, I'm going to teach you how to make this micro macrame pendant:

Micro macrame pendant for the KnotAlong class by Sherri Stokey.

Sounds like fun, right?!  And the best part?  It's free!  That's right - I'm not charging a thing for the class.  Okay, there might be a cost if you need to buy some of the materials involved, but there aren't too many.  If you haven't gathered them up yet, you can find the list here, along with a little video showing all of them and some sources.  You might have most of the thing you need laying around if you dabble in DIY.  Or maybe you can borrow them from Great Aunt Martha if she belongs to the sewing club down at the Senior Center (what?  could happen!).

I'll be putting the video up on Friday morning.  It's finished and ready to go and I'm telling you, it's really detailed! I will show you every single step from cutting the cord to adding a dab of glue at the very end.  I demonstrate every knot - more than once!  You'll be able to pause it and go back if you need to see something again.  You'll even be able to refer back to it later if you get stuck on your next project.

I've created a Facebook event page where we can interact, too.  You can post photos if you really muck something up and need help.  Or you can ask questions if you're too embarrassed to post a picture.  Either way, I'll be there to help out.

Are you ready?

The World's First KnotAlong: A Free Micro Macrame Tutorial

$
0
0
Micro macrame pendant from Knot Just Macrame.

Today's the day, folks!  A couple of weeks ago, I promised I would teach you how to do micro macrame and I'm here to do just that.  If you don't know what I'm talking about, you obviously missed this post, but it's okay!  You can still join in whenever you are ready.  If you did catch that post, you should have the supplies and materials all ready to go for this project.

Here's how it works.  I've prepared a video lesson to walk you through the steps required to make the pendant shown above.  In the process of making this pendant, you'll be learning how to make larks head knots, square knots, overhand knots and double half hitches.  You'll also be learning some micro macrame basics, the terminology and some tips and tricks I've picked up after eight years of knotting.  

Since we can't all physically be in the same room to do this, I've set up a virtual room where we can meet up:  KnotAlong Event.  That's where you will be able to post photos of your work, ask questions if you get stuck and just generally commune with other people learning macrame.  

 Are you excited?  (I am!  I can't believe I'm going to try to teach macrame to a whole bunch of people all at once!)  Let's do this (oh, and don't forget you can make the video full screen if you want)!


If you're having fun with this project, do me a favor and share it with your DIY friends.  You can help me in my quest to bring macrame back!  And if you're really having fun, you can find more tutorials (.pdf format available for instant download) in my Etsy shop and more classes (which include videos) at CraftArtEdu.

I bet you thought I forgot the giveaway I promised?  Since we're all about learning micro macrame here, I'm giving away a complete set of the tutorials I have listed in my Etsy shop to one lucky person.

 Micro macrame tutorials from Knot Just Macrame.

Enter through the widget below.  I'll be choosing a winner on August 31, 2015.  Good luck & happy knotting!!

a Rafflecopter giveaway
PS.  Want a chance to win another prize?  How about a micro macrame bracelet?  The sign up for it is at Love My Art Jewelry and you can enter BOTH drawings!


Viewing all 283 articles
Browse latest View live